6 Design Tips for Small Kitchens

These days it is not uncommon for a kitchen to be so small that it feels like a mere utilitarian portion of the home. This is especially true in homes like apartments, condos, or cottages. But just as it is possible to “open” your living room up with a few tricks, it is also very possible with small kitchens. Here are 6 design tips to help you!

1. Create a lot of storage space

Storage is going to be one of the most important aspects to creating the illusion of an open space. The arch enemy of small kitchens is clutter, so battle it any way you can. Add plenty of drawers, cupboards and even overhead storage space. Make use of hanging racks for pans, glassware, and anything else you don’t have a space for.  Whatever you do, keep as much off the counters as possible.

2. Use that “U” shape or island

Many smaller kitchens are shaped like a U or have islands separating them from the living areas. These might feel like ways of making the room more cramped, but when used correctly can actually make the entire area more efficient. Use the U shape by placing all storage along one wall, and the cooking and serving aspect along the other.  Islands can be turned into all-stop cooking and cleaning areas by simply adding a stove range, small sink and dishwasher to them!
3. Use light colors and a lot of bright, natural lighting

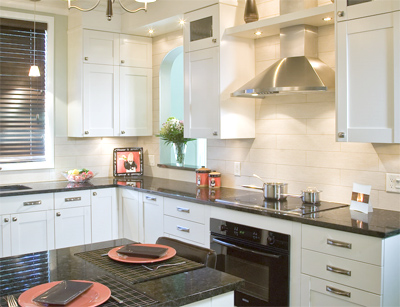
A common trick of interior designers is to use light colors and lots of sunlight to create a spacious, airy feel. The exact same thing can be done in a kitchen. Consider adding a skylight for more natural light exposure, or go for light bulbs that are “bright white”. Don’t go overboard with all shades of white, though. Consider breaking it up with darker counter tops or flooring.

4. Create large walkways

Particular attention should be paid the walkways of the kitchen. These include the entrance and the overall floor space. Cluttering these up or creating a small entryway will make a kitchen feel very claustrophobic, so make sure to open them up!

5. Create ONE Focal point
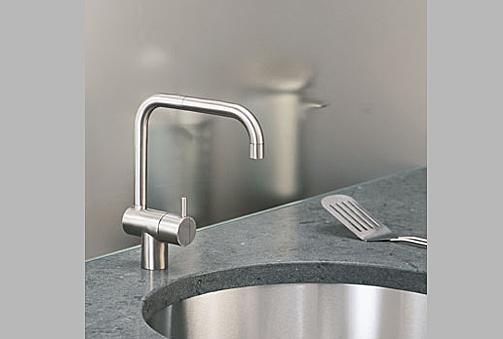
Remember that clutter is your kitchen’s worst enemy. Small kitchens need to avoid clutter even in their very design. You can do this e4asily by simply creating one focal point of the kitchen. Whether it is a colorful back splash or a cutting edge sink, be sure to limit yourself to ONE point.

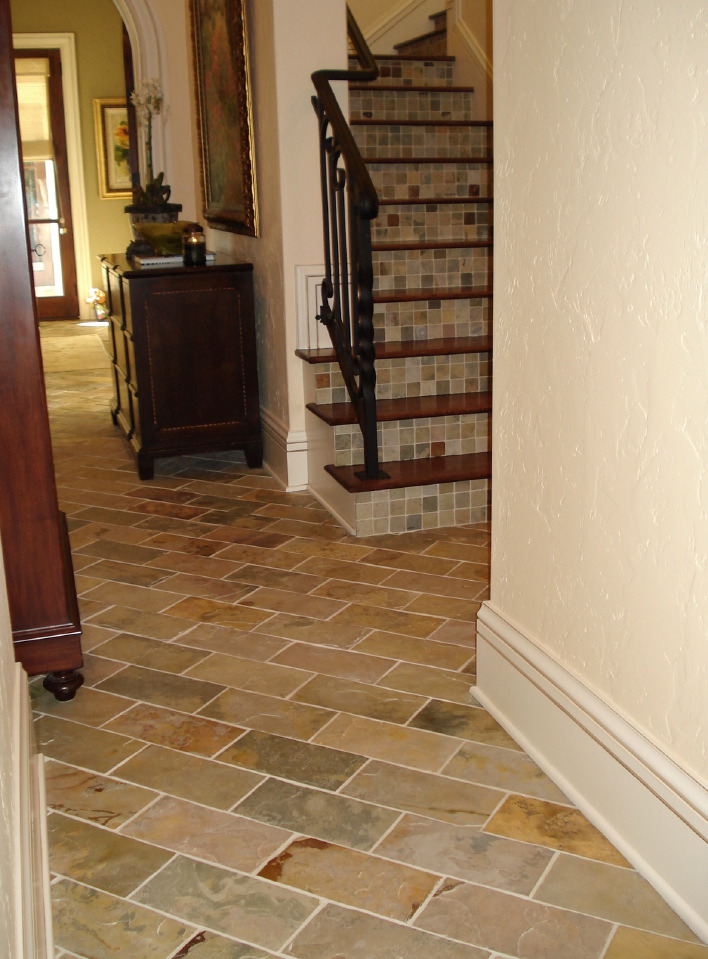
6. Tile the floor diagonally

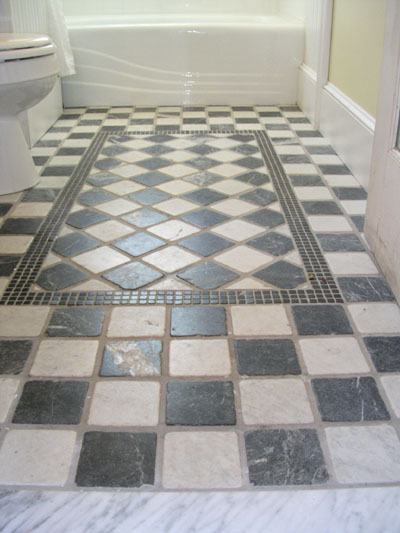
Tile is still one of the most common flooring options, and can actually do wonders for small kitchens. When you are tiling a smaller kitchen, lay the tiles diagonally to create an illusion of length and width at the same time. Add interest not by creating a border with dark tiles, but by sprinkling just a few in with the lighter tiles to add interest and a bit of color.  Bonus Tip: try off-white shades of tile and grout to combat stains!

How to: Replace Broken Tile

Cracks in the tile are generally caused by the building settling, but can also be due to improper tile installation, the wrong kind of tile being used, or accidents. Whatever the reason, broken tiles are generally considered unsightly, and can even lead to more serious problems if moisture happens to get into and under the cracks.

Obviously, in most cases, you won’t want to replace the entire floor due to one or two broken tiles. Here is how to remove and replace the broken tiles easily.

Materials:

• Replacement tile
• Tile adhesive
• Grout
• Water

Tools:

• Grout Scraper
• Hammer
• Pry bar
• Safety glasses
• Trowel
• Grout float
• Sponge
• Small bucket
• Filling knife

  1. Scrape the Grout
     Working around the tile joints (seams), scratch out the grout using the grout scraper. You’ll be getting a pretty fine mess going, but you need to get as much of the grout out as possible. This will separate the broken tile(s) from the ones that are not broken and will make it easier to get a pry bar under the edges if necessary later on.
  2. Break/Loosen the Tile
    With the hammer, hit the tile a couple of times to loosen it from the surface it is adhered to. Depending on the size of the tile, you will probably have to remove it in chunks. Once you’ve broken it up, use the other side of the hammer or the pry bar to lift up the tile pieces.
  3. Scrape Adhesive
    Once you’ve gotten as much of the tile as possible removed, you need to get rid of the old adhesive. Use a scraper, filling knife or even putty knife to scrape it all off.
  4. Clean the surface
    To be sure your new tile properly adheres; you will need to at least dust off the surface.  At best, try to clean the surface with a damp cloth and some mild soap.  Wait until it is completely dry before moving to the next step.  Do not use a wet cloth!  Damp will pick up the dust; wet will get water under the adjacent tiles and cause a lot of issues later on.
  5. Add New Adhesive
    Use the trowel to apply the adhesive back onto the surface (just as the old stuff was.) The layer should be only about ¼ inch.
  6. Set the Tile
    Now place the new tile on top of the adhesive and press firmly in the middle, corners, and along the sides. Press many times and even wiggle the tile a little bit to be sure it is set firmly.
  7. Re-grout
    Now you can mix up your grout into the same paste consistency as the adhesive and use your grout float to smear it along the sides of the tile. Be sure the grout is getting into all of the seams around the tile – don’t leave gaps; fill up each seam completely!
  8. Clean up
    Final StepFinally, you can use your sponge and bucket of water to clean all of the excess grout off the surface of the tiles. The sponge should be damp enough to pick up excess grout, but NOT soaking wet enough to alter the consistency of the grout in the joint.
5 Tips For Choosing the Best Tile Flooring Option

Tile flooring is one of the most popular options throughout the home. But today, there are so many tile flooring options that it can be difficult to know which is right: do you want decorative glass tile or industrial stone? What about glass or any of the other options? If you’ve ever been confused about which type of tile flooring is best, then this post is for you! Here are 5 tips for choosing the best option for any job.

.

.

1. Determine exactly where the tile will be used

Tiles used for a kitchen floor may be very different than those used in a warehouse or garage. A different level of durability will be required for the different places that tile can be used. For example, tile flooring in an industrial or outdoor setting should be suited to weather/temperature changes and heavy wear.

.

2. Determine the intended floor use

Is this tile flooring mostly for looks or function? Most often, the desired result will be a balance of both, but with a slight tip in one direction or the other. Tile flooring that is intended to be mostly functional should be made of things like natural stone or even hardwood. That which is slightly more for look should be made of ceramic or even porcelain and/or polished stone.

.

3. Determine the “sturdiness” of the tile

Delicate glass tiles will most likely be used for projects like shower walls and backsplashes. You wouldn’t want to use a “delicate” tile type for the floor. While some glass tile types are manufactured for heavier use, most often you will find a better option in stone, wood, and others. On top of this, the glaze on some of these tiles should be set at a temperature high enough to create a strength that can withstand heat, cold, and normal wear.

.

4. Understand the “green” options

Today there is more demand than ever for greener options in the home. This includes everything from lower water usage to efficient appliances to the flooring you use. For this reason, materials like bamboo, natural stone, and recycled products are very popular. Terracotta tiles, for example, are usually handcrafted natural options which lower their production impact on the environment.

On the other hand, price might be more important to the particular project at hand. If this is the case, natural or green options are sometimes out of range. With the rise in demand, however, this is not always the case , so be sure to look at all options.

.

5. Go with a high reputation

Last but not least, work with a tile manufacturer/retailer that has a high reputation for providing quality advice as well as products. Buying from a faceless retailer on the Internet will often end in tears or frustration. What if you get the wrong material or accidentally order the wrong size? What if you placed the right order, but were shipped the wrong thing? Or what if the quality of product you receive is below par and the tiles start breaking just months after installation? To ensure that you avoid all of these headaches, only deal with a tile company that you can trust!

Graff Kitchen and Bathroom Faucets

American Ingenuity
Cutting Edge Design.

Graff kitchen and bathroom plumbing collections are among the most popular brand name faucets and taps in the world. Merging American aesthetics with solid European design, Graff creates some of the most exciting product lines Plumbtile.com carries.

Graff Signature Kitchen Faucet Collections

Graff Signature Bathroom Faucet Collections

Graff Bali Wall Mounted Bathroom Faucet
Graff Oscar Pulldown Kitchen Faucet
Graff Tranquility Series Widespread Lavatory
Graff, Bali Series Wall Mounted Lavatory Graff, Solar Series Widespread Lavatory Graff Tranquility Series Widespread Lavatory

Aesthetically pleasing and ergonomically engineered, Graff’s award winning designed faucets and fixtures are more than just hardware.

Choose from a stunning array of beautiful faucets and accessories to create a bath or kitchen at the height of LUXURY. Extraordinary appearance is just the beginning, Graff stands behind its work with the confidence to offer a full lifetime warranty on the mechanical aspects for its entire product line.

Graff - Manufacturing since 1922Headquartered in Milwaukee, Wisconsin, Graff has been one of America’s premier manufacturers since 1922. The company now employs thousands of people around the world, primarily in Europe and the United States.
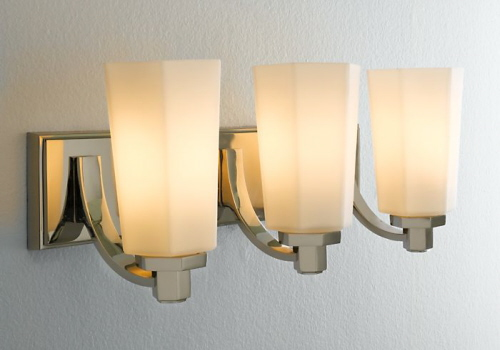

Designed to meet all new LEAD and conservation laws, Graff products are widely available, highly affordable and come in all finishes to match the look of your kitchen or bathroom.

Graff is known as an avant garde kitchen and bathroom fixture designer. Its products are seen in many of the finest hotels, office buildings, museums and homes. Perhaps its most famous installations can be found in the Rainbow Room at Rockerfeller Plaza in New York, or in W Hotels around the world.

Choose from a stunning array of beautiful faucets and accessories to create a bath or kitchen at the height of luxury.

Extraordinary appearance is just the beginning, Graff stands behind its work with the confidence to offer a full lifetime warranty on the mechanical aspects for its entire product line.

Supplying Arthaus-2 with Innovation and Style

Plumbtile is excited to announce our involvement in helping Arthaus-2 come to life! Completed in May of 2010, this modern/contemporary 2-story home is ideally situated across the street from ocean-front homes in the beach city of Leucadia, California and has incredible second story views of the sea as well as the coast.  Smyer Architecture took on this challenging reconstruction and has incorporated numerous features which make it a highly energy-efficient, healthy, and Eco-friendly home.

Continue reading →

How-To: Light Your Bathroom

Last month we produced a blog about properly hanging a mirror in your bathroom, on the basis that everyone needs a clear view of themself when you start or end your day. However, that’s just half the equation- without adequate light in your bathroom, it’d be impossible to truly enjoy your time in it. That said here’s our PlumbTile primer on getting good light in yours bathroom. Continue reading →

How-To: Hang or Mount a Bathroom Mirror

New mirrors are a great way to change a fundamental part of your bathroom. Other than utility, mirrors can also make a room seem larger, which is great if you live in a small apartment or condo. However, how these things are attached to the wall eludes most people, and since they’re very delicate and heavy, it’s mandatory to do it right the first time. That being said, it’s very possible to do it yourself, so let’s get down to it. Continue reading →