Grout and Thinset Tips and Tricks

There are three basic types of grout available for any tiling job.  It is important that you take to the time understand each type so that you can choose the right one for your specific project.  If you choose the wrong one you could end up destroying your tile and watching your grout dry up before it can be used. You can avoid the unnecessary expense of replacing materials by taking the time to educate yourself about grout in advance.

Unsanded grout is a great option to choose.  But, it should only be selected for areas that have grout lines smaller than 1/8”.  This is because the grout actually shrinks as it dries.  So, if the grout line is too wide, then the grout will shrink and no longer be filling the intended grout line completely.

For any grout lines that measure 1/8” or more wide, you should choose a sanded grout.  A sanded grout does not shrink because there is sand added to the mixture. Although it is a great option for any tiling project, you should be careful when you are using it with polished tiles as the sand in the grout can actually scratch the tile. If you are unsure whether your tiles will be damaged by using sanded grout, you can test a piece of tile in advance.  If sanded grout does damage the tile, then you should look toward epoxy grout instead.

Epoxy grout can be used in any width of grout line.  It can also be used with any type of tile without the fear of damaging the tile.  Other benefits of epoxy is that is it both stain resistant and water proof.  However, it does dry fairly quick so it must be applied immediately after mixing. And, it is more expensive than sanded or unsanded grout.

Getting your Mind-set on Thinset

Grout is not the only choice you need to make for applying your tile.  Although it is not as visible as grout, you must also choose your thinset wisely to ensure an excellent finished product.  Thinset is available in either white or grey and is the mortor that is used to apply your tile to the intended surface. It is recommended that you use white with lighter colored grouts and grey with darker colored grouts.

Just like grout, thinset is available as either sanded or unsanded.  You should select sanded thinset for projects like flooring and counters while using unsanded on walls, counters and fixtures. It is a good idea to stay away from quick setting thinset so that you are not rushed to finish your job before the thinset dries.  This will give you the time to make sure all tiles are installed and aligned properly.

6 Steps to Renovating on a Budget

Even in today’s economy, renovation is on almost everyone’s mind. Whether you need to update a bathroom, kitchen, patio, or the whole house, here are 6 tips to renovating on a budget.
.
Tip #1: Scrub EVERYTHING
Within the room your want to renovate, or even the porch, begin by cleaning everything. The floors, walls, sinks, ceiling, nooks, and crannies. Use an afternoon and lots of elbow grease to get the whole area shining. You would be amazed at the difference just this one step can make.
.
Tip #2: Add a fresh coat of paint.
Get a can or two of paint appropriate for the area – IE, paint that is suited for outdoors for a patio, or paint suited for moist environments for the bathroom. In some instances you may need to sand the surface or scrape off old wall paper before painting. You can also easily add accents with one large can of one color and a smaller can of the accent color.
.
Tip #3: Add accessories
Adding a few decorative accessories can update a room very quickly, but be sure they do not add clutter to the area. You want accessories which either tastefully add to the decor or serve a functional purpose – or both!
.
Tip #4: Replace key elements of the room
In the bathroom, the shower head, faucets, and cabinet facing are key to the entire look and feel of the room. In a kitchen, you may only need a new sink to freshen up the decor. Take some time to decide what two or three things really make the room, and then replace only them with updated versions.
.
Tip#5: Add more light
One of the most well-known ways of brightening and opening up a room is to add more light to it. This could be in the form of natural light with a larger window or skylights, or in the form of  new lighting sources in the room. Add some ceiling lights as well as accent lighting, and use natural, white light bulbs for the brightest, most welcoming effect.
.
Tip #6: Keep the room free of clutter
Whether your room or area is small or large, it is very important that you keep it completely free of clutter. Clutter is the fastest way to make a room feel mush smaller, dirty, and worn-out. To accomplish this, storage is KEY. Add new ways of storing items which you don’t always use. Keep the storage out of sight or blend it in as part of the decor.
.
These tips will help you update your room on a budget, and can be applied to any area of your home. Have fun experimenting and trying out different tips in different areas to have a home that is unique to you.
.
Here is a video with some direct tips for renovating a bathroom on a budget.

[youtube=”http://www.youtube.com/watch?v=m-fb1Fi5Fkw”]

Announcing the Plumbtile Official Video Channel

Great news! Now you can get regular updates of Plumbtile’s luxury brands and huge selection – all in video format. We have established the Official Plumbtile Video Channel to bring you updates and information on your favorite brands and products – or perhaps even to introduce you to some brand new ones.

But it’s not all business at the Plumbtile video channel. Just check out this fun video full of toilets you have probably never seen before.

Stay tuned for regular updates, how-to videos, interesting information, or just some fun and wild videos, and feel free to connect with us at the social profiles listed at the bottom of our videos page. Remember: our free Starbucks card promotion is still going on for Facebook! Grab yourself some coffee and enjoy some videos.

How to Replace Your Kitchen Sink

The kitchen sink sees constant use on a daily basis, and eventually will need to be replaced. Sometimes, you may want to replace the sink simply to upgrade, or to conserve more water. Whatever the reason, it is good to have a few tips in mind before you replace your sink. Here are some of Plumbtile’s top tips, as well as a how-to video for replacing your kitchen sink.

First, it is very important to take into account the type of function you wish to have, as well as the amount of work you are willing to do. If you currently have a single bowl sink and are looking to get a double bowl, there is going to be some work involved in cutting your counter top. This may even have to be done by a professional.

Of course, design is always a factor to consider as well. Many water-conserving sinks and faucets these days come in luxury finishes and designs, so it should not be hard to find one that fits your kitchen perfectly. You may even find that this upgrade makes your life much easier, with so many new developments in faucet design!

Once you have chosen the sink you want, you must know how to install it (if you are doing so yourself.)  We have found this video to be very helpful in showing you exactly what needs to be done.

[youtube=http://youtu.be/awEi4xoScn0]

If you’re still having trouble deciding which sink style and brand fits your needs best, be sure to speak to a trusted retailer to get expert advice and guidance. You will probably have this sink for many years, so make sure it is perfect for you!

Modern Ideas from Vintage Classics

The kitchen is the center of the home, and with good reason. Communing over food is a quintessential part of the human experience, and many homeowners want to capture the feeling of this timeless tradition in the décor of their kitchen. Modern, fresh looks, designed to enrich our lives by creating invigorating spaces, can be made more inviting by including design elements inspired by vintage classics. The subtle mix between old and new creates a space loved by all.

In addition to creating an incredibly welcoming kitchen to add to the experience of being in one’s home, it makes financial sense to focus on the kitchen. By investing no more than 15% of a home’s value into a kitchen renovation, the typical homeowner can anticipate to at least make a 100% Return on Investment in a positive gain to the increase in home equity by having a beautiful kitchen remodel. While some decorating fads come and go, making choices that are variations on vintage classic design is a surefire way to insulate your investment in your remodel against depreciation.

The popularity of prime time cooking shows, people finding the need to prepare more of their meals at home, as well as the reward from sheer enjoyment of a delicious, home-cooked meal are all influencing the appreciation of a functional kitchen. One way to improve a kitchen’s functionality is to have a kitchen sink that is completely useable. A space large enough to be able to place a stockpot within the sink basin without creating a flood while trying to wash or fill such an oversized item. A sink with a clear and ready path to the garbage disposal so the home cook can easily keep the workspace clean during food preparation. Improved functionality helps make the daily chore of cooking a very pleasant task.

A great way to blend the modern and the classic, to combine function with a comforting décor, is to include a farmhouse sink in your kitchen remodel. There are many, many options for farmhouse sinks these days, from the classic, ceramic coated, clean edged pristine white basin one would find in an authentic 1900’s farmhouse, to a modern twist on this design, such as this Black Granite Double Basin Farmhouse Sink from Stone Forest. Pairing this sink with Lefroy Brooks K1-3100 kitchen bridge mixer faucet creates a very urban chic feel from this vintage inspiration.

For an overall classic feel, consider a very plain white basin, such as this Whitehaus Farmhouse sink. This sink pairs well with the very classic lines of Lefroy Brooks C1-1110 (LB 9007) Cross Handle basin bridge mixer faucet. Together they create classic vintage simplicity, a completely timeless choice. If your tastes are a little less utilitarian, and you would like a touch of elegance, a great mix is to go with a sink with a bit of styling to its front face, such as this Luberon Fireclay Farm House Sink from Herbeau. The subtle curves from the flourished edges tie nicely to the lines of the La Chapelle FH 1530 deck mounted kitchen mixer faucet (Lefroy Brooks). Curves, being a more complex and sophisticated shape, add a touch of elegance to this functional classic.

Bathroom Design Tips For Multiple Users

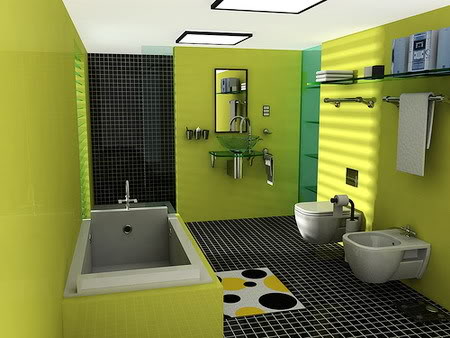
Like many, you probably have more than one person using the main bathroom in your home (or perhaps you only have one bathroom for everyone), and are looking for ways for everyone’s things to live harmoniously in a clutter-free environment. This does not have to be difficult and doesn’t need to cost a fortune! Here are 4 ways to add extra space, hide clutter, and allow multiple users to enjoy their bathroom time!

1.  Use Hideaway Storage

There are many options for hiding the shampoos, makeup, and other toiletries your household has. Hideaway storage helps clear up counter space and create a streamlined décor, making the bathroom seem larger. Besides the traditional drawers below your vanity mirror, try adding roll-out drawers below the sink. You can usually stack up two or three drawers, and hide many products in them. Just make sure you don’t have a leaky faucet!

2. Add Some Product Caves

Within the shower, above the bath and above the toilet there is usually some empty space between wall studs. This can very easily be cut out and turned into a tiled cubby area complete with a shelf or two, and these little areas are great for towels, bath and shower needs, and even luxury items like candles!

3. Get Rid of the Space Hogs

Typical items which hog space in a smaller bathroom include large vanities and toilets. Consider replacing these with a pedestal sink and smaller toilet. Use the options for wall storage to store the items necessary, and keep the floor area open to create a feel of much more space.

4. Add Single Shelves in Open Areas

Finally, if you don’t have many places to add an inlaid shelf (or have used up all of your inlaid shelves), you can tack on single shelves in areas that are typically wasted. The most commonly overlooked areas for a shelf or two is between your bathroom window and the ceiling and in corners of the room.. These are typically just empty space, but adding a shelf means just a bit more storage that is up and out of the way. As always, make sure the shelving options are not intrusive to the functionality or overall design!

There are also several design tricks to make  a room appear larger than it is, which can help you and other users of your bathroom coexist in peace. Really, it is not about the size of your bathroom, but how you use the space!

How-To: Choose and Lay Mosaic Tile

Mosaic tile is a very popular design choice for floors, walls, back splashes, accents, and even walkways. Because much of it is made of natural stone, it creates that natural elegance that compliments almost any design or color scheme. It also provides a mild texture that is necessary for a complete and beautiful room design.

Choosing mosaic tile can sometimes be difficult, because there are many different materials, sizes, and colors. However, the material you decide on should be in line with the usual tile flooring guidelines. This “fancy” tile still needs to be durable to be used as flooring! Color, of course, depends on your own preference and the palette chosen for the area you will be tiling. One of our favorites is the Silver Quartzite mosaic tile from Island Stone (shown left.) This tile is made of natural tumbled stone to bring out the natural beauty, and the size is perfect for many floors and walls, making it very versatile.

Typically, smaller tiles are used for accents and back splashes, while the large mosaic tiles are used for flooring, to cover walls, and for walkways. Using the mesh-backed tile means you can trim where necessary to custom fit your project.

Laying the tile is very easy, but there are a few tips to keep in mind that will help you get the most beautiful, professional-looking installation. The below video does a wonderful job of explaining the best way to lay a mosaic tile floor.

How to lay Pebble Tile Like a Pro

Pebble tile has become very popular among all types of designers, builders, and homeowners because it provides a perfect harmony of contemporary style with rustic and outdoor charm. It can often be found in spas, giving it a connection to luxury that many have decided to take home. Luckily, laying pebble tile is also very easy. Here are supplies and steps you will need to complete a pebble tile floor.

1. Determine how many tiles you will need.

First, measure the area which you will be tiling – whether it’s a shower, an entire floor, or an outdoor pathway. The measurements will help you decide how many tiles you will need, and it is a good idea to pick up a few extra just in case!

2. Layout your tile design.

Pebble tile has a very cool design in which the sides of two tiles will literally interlock with each other so there is no visible seam. Use this feature as you lay your tile out before you adhere them into place. As you do this, you may find some area where pebbles hang over your tile line, and some areas where there are gaps. Remove the extra pebbles, cut back the mesh to line up with your tiling edge, and then later use the individual stones to fill in the gaps.

3. Apply Thinset

Lay thin set evenly over the floor – you want it to be no thicker than 1/8” all over.  Depending on the size of the area you are working in, you may need to work in 3’ x 3’ squares of laying Thinset and then laying the tile. If your area is smaller than 5’ x 5’, you don’t have to worry about this. If Thinset gets on the tops of the pebbles, simply use a wet sponge to wipe them clean. 

4. Adhere the tiles.

As you lay the tiles, you should already have a good idea of how they fit together (from your earlier lay). Just follow this and make sure to firmly set each tile sheet in the adhesive. You may even want to use a rubber float to apply even pressure over the entire surface of the tiles to be sure they are all set firmly. Now, you can use those individual pebbles to fill in any gaps. If necessary, add a bit more Thinset directly to the back of the stones and press them into the gaps. Pay close attention to the edges, to create an even edge. 

5. Apply sealant.

Allow 24 hours for the Thinset to dry, then apply a coat of sealer to top of the stones to prevent  them  from absorbing any grout. Try to apply the sealant just to the top surfaces of the pebbles, as coating the sides will make it difficult for grouting later. The best way to do this is get an even coat on a paint roller and use it to cover the tiles.  

6. Grout

Once the sealant is dry, use grout over the tops of all tiles. Make sure you use enough so that it fills the grooves between the pebbles, and use a float and even your (gloved) hands to guide and gently push it into the cracks and grooves.

7. Clean excess grout.

Allow the grout to set for about 15 to 20 minutes, then use a clean bristle brush to softly brush away the grout on top of the stones. Don’t push too hard or you’ll start digging at the grout between the pebbles! Next, use a  wet sponge to wipe the rest of the excess grout away. Rinse the sponge often in a bucket of clean water. You will probably need to wipe the pebbles down several times before they are completely clean.  Finally, let the grout set for 24 hours and you’re done!

Home Improvement: Gift Ideas for Dad

This year, why get dad another tie when you could get him something he might actually use? Most fathers are the do-it-yourself type, and love to get tools and materials for building or upgrading areas around your home. With a creative home improvement gift, you will be giving him that PLUS the ability to improve the look and value of his home. It is definitely a win-win! Here are just a few home improvement gift ideas for dad:

Faucets/sinks
One of the easiest ways to upgrade a kitchen or bathroom is with a new sink and faucet. This is especially true if dad happens to have a sink that leaks or is not very efficient. A new model will not only look better, but may also save him money and help the planet. Consider looking for eco-friendly versions on sale.

Flooring(One of the Best Gift Ideas for Dad in 2011!)
A recent study shows that more than 33% of homeowners planning to do renovations in 2011 have made “flooring” their top priority. In some cases, flooring is the only upgrade they plan to make. It truly is amazing what new tile can do for a kitchen or bathroom, even if you change nothing else! Why not give dad permission to replace that old, worn flooring with some brand new tile? There are so many options to choose from, that every taste and style can be accommodated.

Bathroom accessories
As the old saying goes, “It’s the little things that count.” When you think of renovating that bathroom or kitchen, you may think of big and rather costly options such as appliances and knocking out walls, which might make them a bit much when it comes to gift ideas for dad. In all actuality, however,  you can do wonders with just a few “little things.” New fixtures, doorknobs, and even lighting can make a dramatic difference in a room. Pair these with a new coat of paint and you’ve got a beautiful mini-reno even on a tight budget!

Of course, finding these gift ideas for dad doesn’t have to break the bank. Plumbtile currently has an entire line of faucets, sinks, bathroom accessories and more on clearance! Feel free to check out the selection here.

3 Elements You Need to Create a Spectacular Walk-in Shower

When we see those large, walk in showers, many of us can immediately imagine the instant relaxation we’d feel from stepping into one – before even turning on the water! When broken down, however, these showers are actually made of very simple elements. There is no reason that more of us can’t have walk in showers to enjoy! Here are the three essential pieces you need to create that luxurious spa experience in-home.

The Right Tile
Tumbled stone tile flooring is a very popular choice for walk-in showers. Just as with any other tile project, you need to be sure that the tile is made of the correct materials for the job – porcelain and ceramic might be disastrous on the floor of a shower! Tumbled stone. mosaic, or pebble style tiling will give the shower a natural feel and won’t be slippery when wet!

Tiles along the shower walls can be (and usually are) larger body tiles than those of the floor. If you’d really like to increase the “open” feeling of a walk-in shower, try laying these tiles diagonally. The colors and patterns you choose are up to you, but to maintain that comforting spa feel, try to stay with cool and relaxing colors.

.

The Right Shower Head
Ideally, you may want to have two shower heads in a walk-in shower. It is a common misconception that a larger shower needs several shower heads and therefore to waste much more water than others. Instead, go for a larger rain dome style shower head. This will provide plenty of water for you, while actually using less of it than traditional shower heads. Also, a hand-held shower head can be included as a option for directed water pressure. This way the shower will never feel “lacking.”

The right Lighting
Finally, a larger walk-in shower will need the right kind of lighting to complete the relaxing atmosphere. The first step is to add a window close to the ceiling which will allow natural light to flow in whenever possible. For showering at night or on cloudy days, include a few recessed lights in the ceiling of the shower – as opposed to the main bathroom lights which are outside.  This creates that feeling of a personal retreat. Go for lights that simulate sunlight, and be sure the fixtures are graded for use in damp areas.

Of course, the best ways to create the perfect relaxing walk-in shower is to add your own touches. Glass doors and walls are very common, and fixtures along the wall for soaps, shampoos and other shower necessities will also add to the look and feel. These basic tips will start that walk-in shower for you, but your own personal style will make it perfect!