Laying tile is a time-consuming job, but can be done with some preparation, planning, and proper equipment. Install a beautiful tile floor in your home with these easy-to-follow instructions.
Continue reading →
Laying tile is a time-consuming job, but can be done with some preparation, planning, and proper equipment. Install a beautiful tile floor in your home with these easy-to-follow instructions.
Continue reading →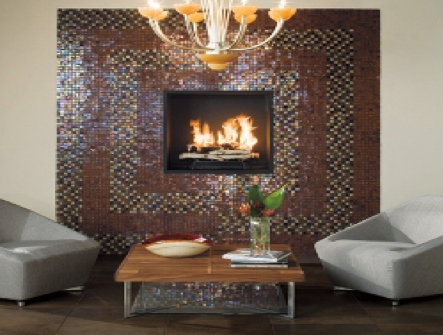
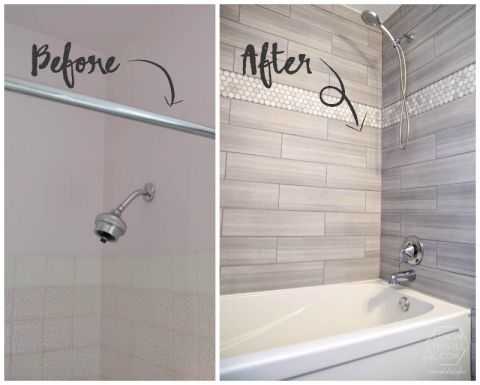
When setting and creating a beautiful room with gorgeous tiles you will need to do a lot of preparation and planning. Choosing your beautiful tile is just the first step in making sure your remodeling has been done correctly.
Some things you might want to keep in mind before you start placing your tiles. Do you know what type of tiles you want to use? Knowing what tile, you will want to place down whether it is glass, porcelain, or wood tiles will determine the rest of the materials used.
Once that is set you will want to choose the type of mortar. You will also want to get a piece of flat wood or metal board, so you can level the mortar before it dries. You will also want to get grout, a square to lay the tile, and something to cut the tiles.
Once you have all of your materials lined up you can begin by creating a layout design of your room, so you know where you will be making cuts. If you don’t go in prepared you may end up
Making a lot of mistakes and wasting many tiles. If you are using patterned tile you will want to make sure that when you cut it, you line up the patterns.
You will want to make sure you transition any tiles that are on the ends or against the wall. If you don’t transition them properly it will look unfinished and unpolished. Figuring out how you will handle these transitions is part of the planning process because you will need to order these pieces with your tile.
One more tip you want to keep in mind is the thickness of your tile. Tile can become heavy and you will want to make sure your floor joists can handle the weight and put down ¾-inch plywood with ½-inch cement board on top. Check that your walls and floors are flat with a long straight edge. You will want to make sure your floor is level if you are going to use a baseboard-style trim piece. Also, keep in mind that glass tile expands and contracts at a higher rate than other tiles and is more prone to stress fractures. If you have any questions or are unsure you can contact one of our specialists at Plumbtile.
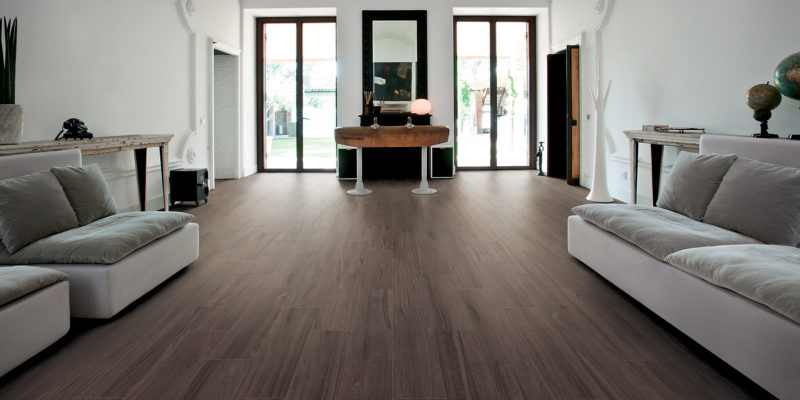
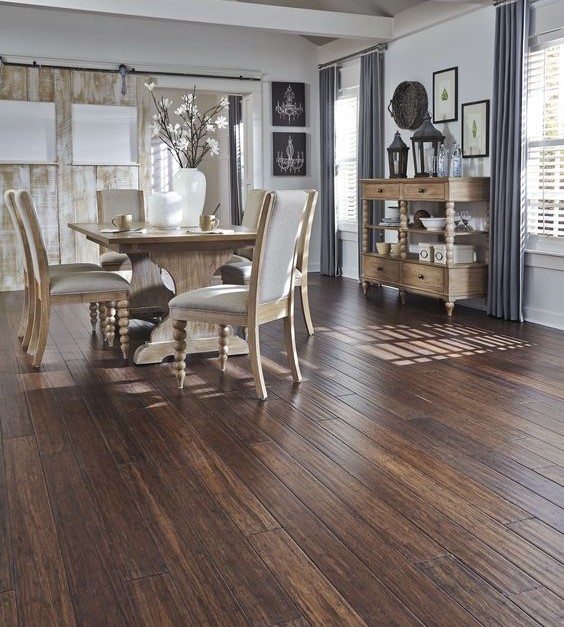
Do you want to renovate your floors but you can’t quite put your foot on what design you want to go with? Hardwood floors are not a bad option to go with. They already bring so much character and sophistication to any home. Imagine if you put a slight twist on it by installing hardwood floors in patterns?
When setting and creating a beautiful room with gorgeous tiles you will need to do a lot of preparation and planning. Choosing your beautiful tile is just the first step in making sure your remodeling has been done correctly.
Some things you might want to keep in mind before you start placing your tiles. Do you know what type of tiles you want to use? Knowing what tile, you will want to place down whether it is glass, porcelain or wood tiles will determine the rest of the materials used. Continue reading →
When most people hear the word renovation, they panic. Remodeling has never been an easy task for most people. So many things can go wrong from overspending to physical disasters. It is a task that can bring upon stress and anxiety. But with everything in life, having a plan of action set in place beforehand can avoid a lot of unnecessary pain in the long run.
There are so many DIY blogs and podcasts out there that self renovation has become a lot more common. It also helps the homeowner when it comes to budget. But is doing it yourself always the best option?
When is the right and wrong time to DIY?
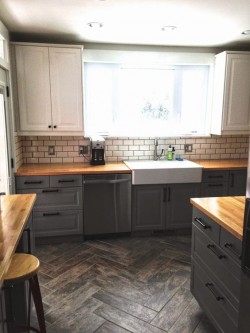
When choosing a flooring type for your kitchen and bathroom you have to look for aspects that will not only enhance your room but also offer longevity. Several types of tile flooring will work great but tile can be hard on your legs and feet when working in the kitchen. The best type of flooring is cork or bamboo, it is softer, easy on your legs and feet and is great in damp areas.
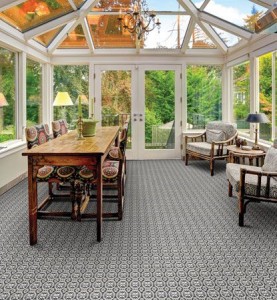
If you are looking for an alternative to tile or wood flooring for your porch or lanai consider indoor-outdoor carpet, it is perfect for enclosed porches because it’s resistant to mildew and stains. It’s a much better choice than standard indoor carpet for giving your porch a finished look, and installation is easy.
To figure out how much carpet to buy, measure the length and width of your room, add 6 inches to each measurement, and multiply the two numbers. Here’s how to install it:
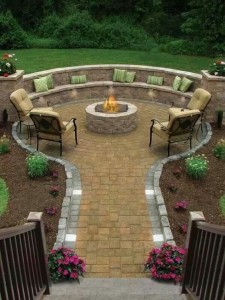 Spring is in the air and that means your backyard will soon get more action! Spending time with the family and friends outdoors is one of the best ways to pass your weekend and evening. Don’t let another year pass without creating that fire pit you have always wanted.
Choose a location. Select a location that’s away from any combustibles such as bushes, sheds, low-hanging branches, etc. If you want it to be an extension of your back deck or your outdoor kitchen consider replacing the wood from the deck with tile that looks like wood. With this concept you can extend your deck add a foot path and then the same flooring around the pit.
Lay out the fire pit. Starting at the center, paint a five-foot diameter circle using a string as a compass. Tie one end of the string around the can of spray paint, then the other around a stake at the center of the pit. You’ll also need to paint a three-foot diameter circle for the actual pit, and a 12-foot diameter circle for the seating area.
Dig the footer and pour concrete. With the location laid out, dig out the footer for the inner and outer walls of the fire pit, digging between the three-foot and five-foot circles, about five to six inches deep. Following the manufacturer’s instructions, mix the fast-set concrete in a wheelbarrow and fill the ring with concrete. Make sure the top is level and smooth. Wait for the concrete to set up.
Separate your stones while you wait. While the concrete is setting, you can use that time to separate your stones into face stones, and a few for cap stones. The cap stones will be used to make the top of the fire pit wall, so keep the flat, smooth stones for the caps. The rest of the stones will make the wall.
Start laying stone. Start laying the stone in a ring, following the outer edge of the footing. Once the first complete ring is done, lay a ring of fire brick (on their edge, so they stand three-inches high) around the inner ring of the pit.
Continue the stone. Continue laying rings of stone on top of others. Continue laying courses of fire brick, as well. Keep everything level by choosing stones that fit. If they don’t fit, cut them. Try to avoid laying diagonal and vertical stones, they look bad and cause instability in the wall.
Fill the wall. Once the stone and fire brick are at the height you need, fill the void between the fire brick and stone walls using scrap stone and mortar. You’ll want the wall to be totally solid before you cap it.
Place the cap stones. Lay the cap stones on the top of the wall, laying them out in dry-stack to make certain that everything fits. Cut individual stones to fit, if necessary. Once you’ve got a good fit, mortar the stones into place.
Seating Area. For the seating area, dig out the grass in the area inside the 12-foot circle you painted, and lay down landscape cloth. Fill the area with gravel. Enjoy.
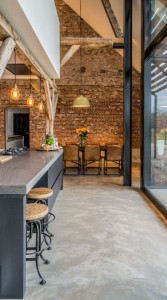 When deciding on flooring the homeowner now has several choices, you can use a more traditional flooring such as hardwood or tile or you can use concrete for a unique flooring. The advice below may seem straightforward, but it is following the directions and being diligent that provide the best results.