
Size, height, and function all play a role in selecting a toilet for your new bathroom. These tips will help you find the right commode for your family.
Continue reading →
Size, height, and function all play a role in selecting a toilet for your new bathroom. These tips will help you find the right commode for your family.
Continue reading →
When you have to replace the shower mixing valve will be a bit tougher than just replacing a faucet because this part of the shower is behind the wall. If you have a tiled wall this will require you to remove the tile from the wall and then replace it once you are finished.
If you are adding a bathroom or remodeling remember to add a access panel this will prevent you from having to remove and replace your tile, if you don’t have a access panel then unfortunately you will have to create one by breaking through the wall.

Here are the steps you will need to take to make:
Make sure you check with your local building department you might need a permit, check local codes to verify if your new valve needs to balance water pressure and limit temperature to prevent scalding. With all that down now you can sit back and relax at a job well done!

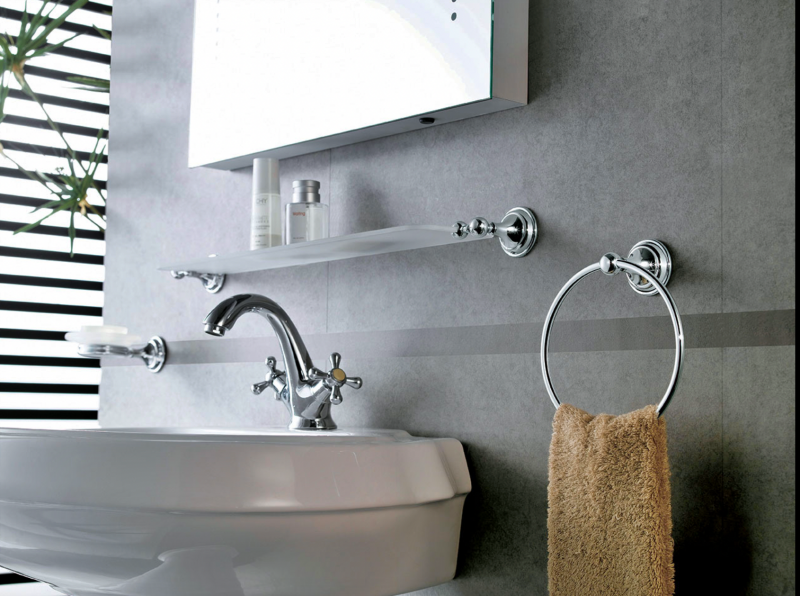
When designing, remodeling, or updating your bathroom, you’ll find that as you gather your ideas, a trend will emerge in what you are most interested in. If you are going for a sleek, modern look, you’ll find chrome accessories that suit your style. The same is true if you are looking for a more nostalgic or old-style look. You’ll also find lovely extras such as vanity chairs, lotion dispensers, glass canisters, and many other items with chrome trim that you can further decorate with.
Continue reading →
With the rising cost of energy, we are always looking for ways to save both energy and money. When purchasing our appliances, central units, and water heaters we look at the energy labels, we add more insulation to our homes during remodels or a new build because every little bit counts. But did you know there are little things that you can do to help reduce your energy bill and save money throughout the year?
Continue reading →
There is such a wide range of bathroom faucets on the market today. I bet you are confused and unsure of which one you want or what faucet would look best in your space. Well let’s start with the different styles of faucets so you have an idea of the uses and looks.
Continue reading →
Buying a bathtub may seem easy. It may seem a no-brainer- just pick a color, choose the size and shape, and you’ll be walking out of the store with a designer bathtub. But this is not always the case. Know what you are looking for before making that purchase. At PlumbTile, our online Bath and Tile Design Showroom, you will be presented with a variety of products that will go well with your bathroom requirements. The site will help you consider different options, and not limit you to just the shape or color of tubs.
Continue reading →
For a big impact with a small investment for your bathroom or kitchen, consider changing the faucet! It’s a super easy, relatively low-cost improvement, that in some cases, can totally change the look and feel of your space!
Continue reading →
Your shiny new bathroom sink, along with a new faucet and countertop, will jazz up your bathroom design as much as new flooring and accessories, and for a lot less money. Before you start the installation process though, make sure you have all the measurements you need to connect the sink to the drain including the inside the pipe fittings and how much space there is underneath your sink.
Continue reading →
Is it time to replace a faucet in your kitchen or bathroom? While some people may think that it is a challenge replacing a leaky or outdated faucet isn’t always as difficult as you may think. You can easily tackle the project with a basin wrench and a few other common tools. Usually, it will only take about an hour. The same steps will apply if you are installing a new faucet onto a new sink.

Removing the old faucet:
Step 1: Turn off the water supply. The valves are typically under the sink. If not, turn the water off at the main valve. Then turn on the faucet to relieve any water pressure left in the lines.
Step 2: Disconnect the supply lines from the faucet. Use a basin wrench if you can’t reach the connections with your hands.
Step 3: Disconnect the lift rod, and then remove the nuts from under the faucet.
Remove the drain:
Step 4: Unscrew the slip nut on the P-trap. Put a bucket underneath to catch water in the trap.
Step 5: Disconnect the drain flange from the tailpiece. It should unscrew.
Step 6: Clean the old drain and faucet holes. Mineral spirits can help to remove old silicone sealant.
Install the New Faucet:
Step 7: Follow the manufacturer’s directions for specific installation instructions. Most installations begin with installing the gasket on the bottom of the faucet. Some require sealant of plumber’s putty. Then put the faucet through the mounting holes in the sink and tighten the mounting nuts.
Step 8: Not all faucets come preassembled, so you may have to attach the handles. It is relatively easy. Slip the guide ring onto the bottom of the handle, position it on the faucet base, and secure with the setscrew. A setscrew is a tiny screw on the underside of the handle. Your faucet probably came with a hex wrench to tighten it.
Step 9: Next move onto the drain. Screw the nut all the way down on the drain body and push the gasket over it. Some gaskets are threaded and simply screw into place.
Step 10: Apply just a little bit of silicone under the flange. Position the drain body on the bottom of the sink- making sure the pivot hole is facing the back- and screw the flange on from the top side.
Step 11: Underneath, tighten the nut and gasket. On the top, use mineral spirits to clean up excess silicone.
Step 12: Install the drain rod next. Unscrew the pivot nut on the drain body, insert the horizontal rod through the hole in the stopper, and replace the nut. Push the horizontal rod down and secure the lift rod to the strap with the screw. Test the lift rod.
Step 13: Reconnect the supply lines to the faucet. If your sink is already in place, use a basin wrench to reach the faucet shanks.
Step 14: Flush the faucet by removing the aerator. This gets rid of debris or sediment in the faucet. Some faucets include a handy little tool to unscrew the aerator. When you’re done, keep it inside your vanity or with the rest of your tools. Turn on the hot and cold water for about a minute. Check all of the connections for leaks and retighten if necessary. Screw the aerator back on and you are done.
If you are in the market for a new kitchen or bathroom faucet, contact us at Plumbtile and we can help you pick from many options of quality kitchen and bathroom faucets for your home.
Unlike an en suite, the family bathroom must meet the needs of every generation, from Mom and Dad to teenagers and toddlers. That’s a lot to cope with, while still being a guest-friendly atmosphere. These tips will help you make the most of your space. Continue reading →