The winter is behind us, and summer is coming! After a long and cold winter, everyone is ready to entertain guests with a new outdoor kitchen and dining area! If you don’t have one, don’t worry. Cooking up a great outdoor kitchen is easier than you think. Continue reading →
Upgrade Your Porch for Summer
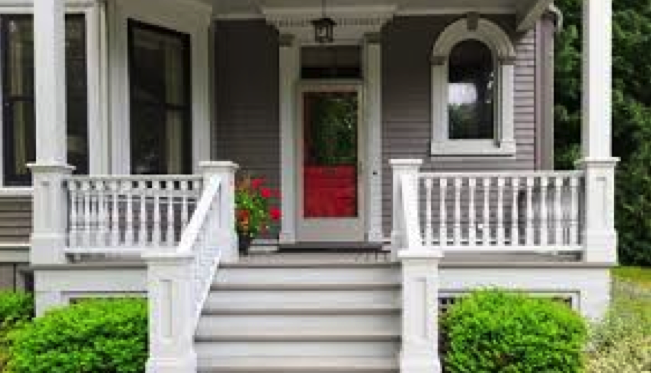
Photo courtesy of jigsawexplorer
The weather is changing and there is nothing better than spending time outside with friends and family. But what if you don’t have a porch or your porch is in disarray. We have some budget friendly porch ideas. You may want to clear out those cobwebs and fix that porch swing. Spruce your space up without going over your budget. Continue reading →
How to Build a Fold-Down Outdoor Bar
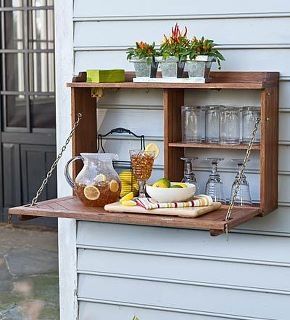
A fold-down bar or a Murphy bar is a bar area that folds away when not in use to save space and is perfect for small outdoor areas. This is an ideal solution for any small space inside your home or outside. When it’s folded, you can hide it with plants or furniture, and then those items can be moved when in use. The bar is built sturdy enough to hold dishes, serve food and drinks and will surprise and impress your guests. It is the perfect idea for outdoor parties. Let’s get started!
How to Build a Porch Swing Out of a Door
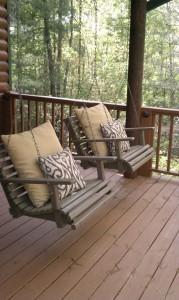
Have you ever longed for a swing on your porch right outside your kitchen window? Or maybe in your backyard around the fire-pit you built but think it is too complicated and you haven’t decided yet to purchase one? No fear we have you covered. These step by step instructions will walk you through setting up that swing!
How To Build a Backyard Fire Pit
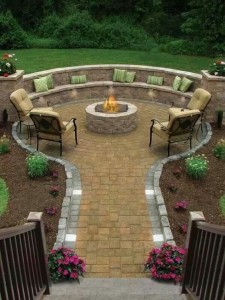 Spring is in the air and that means your backyard will soon get more action! Spending time with the family and friends outdoors is one of the best ways to pass your weekend and evening. Don’t let another year pass without creating that fire pit you have always wanted.
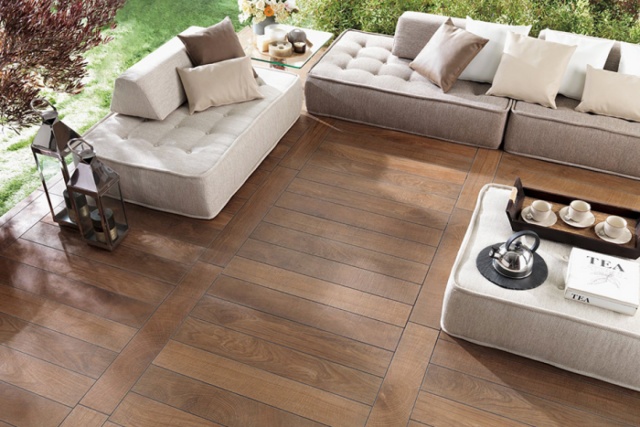
Choose a location. Select a location that’s away from any combustibles such as bushes, sheds, low-hanging branches, etc. If you want it to be an extension of your back deck or your outdoor kitchen consider replacing the wood from the deck with tile that looks like wood. With this concept you can extend your deck add a foot path and then the same flooring around the pit.
Lay out the fire pit. Starting at the center, paint a five-foot diameter circle using a string as a compass. Tie one end of the string around the can of spray paint, then the other around a stake at the center of the pit. You’ll also need to paint a three-foot diameter circle for the actual pit, and a 12-foot diameter circle for the seating area.
Dig the footer and pour concrete. With the location laid out, dig out the footer for the inner and outer walls of the fire pit, digging between the three-foot and five-foot circles, about five to six inches deep. Following the manufacturer’s instructions, mix the fast-set concrete in a wheelbarrow and fill the ring with concrete. Make sure the top is level and smooth. Wait for the concrete to set up.
Separate your stones while you wait. While the concrete is setting, you can use that time to separate your stones into face stones, and a few for cap stones. The cap stones will be used to make the top of the fire pit wall, so keep the flat, smooth stones for the caps. The rest of the stones will make the wall.
Start laying stone. Start laying the stone in a ring, following the outer edge of the footing. Once the first complete ring is done, lay a ring of fire brick (on their edge, so they stand three-inches high) around the inner ring of the pit.
Continue the stone. Continue laying rings of stone on top of others. Continue laying courses of fire brick, as well. Keep everything level by choosing stones that fit. If they don’t fit, cut them. Try to avoid laying diagonal and vertical stones, they look bad and cause instability in the wall.
Fill the wall. Once the stone and fire brick are at the height you need, fill the void between the fire brick and stone walls using scrap stone and mortar. You’ll want the wall to be totally solid before you cap it.
Place the cap stones. Lay the cap stones on the top of the wall, laying them out in dry-stack to make certain that everything fits. Cut individual stones to fit, if necessary. Once you’ve got a good fit, mortar the stones into place.
Seating Area. For the seating area, dig out the grass in the area inside the 12-foot circle you painted, and lay down landscape cloth. Fill the area with gravel. Enjoy.