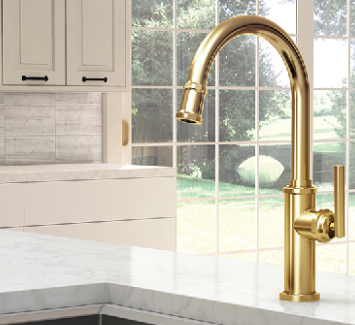
For a big impact with a small investment for your bathroom or kitchen, consider changing the faucet! It’s a super easy, relatively low-cost improvement, that in some cases, can totally change the look and feel of your space!
Continue reading →
For a big impact with a small investment for your bathroom or kitchen, consider changing the faucet! It’s a super easy, relatively low-cost improvement, that in some cases, can totally change the look and feel of your space!
Continue reading →
Is it time to replace a faucet in your kitchen or bathroom? While some people may think that it is a challenge replacing a leaky or outdated faucet isn’t always as difficult as you may think. You can easily tackle the project with a basin wrench and a few other common tools. Usually, it will only take about an hour. The same steps will apply if you are installing a new faucet onto a new sink.

Removing the old faucet:
Step 1: Turn off the water supply. The valves are typically under the sink. If not, turn the water off at the main valve. Then turn on the faucet to relieve any water pressure left in the lines.
Step 2: Disconnect the supply lines from the faucet. Use a basin wrench if you can’t reach the connections with your hands.
Step 3: Disconnect the lift rod, and then remove the nuts from under the faucet.
Remove the drain:
Step 4: Unscrew the slip nut on the P-trap. Put a bucket underneath to catch water in the trap.
Step 5: Disconnect the drain flange from the tailpiece. It should unscrew.
Step 6: Clean the old drain and faucet holes. Mineral spirits can help to remove old silicone sealant.
Install the New Faucet:
Step 7: Follow the manufacturer’s directions for specific installation instructions. Most installations begin with installing the gasket on the bottom of the faucet. Some require sealant of plumber’s putty. Then put the faucet through the mounting holes in the sink and tighten the mounting nuts.
Step 8: Not all faucets come preassembled, so you may have to attach the handles. It is relatively easy. Slip the guide ring onto the bottom of the handle, position it on the faucet base, and secure with the setscrew. A setscrew is a tiny screw on the underside of the handle. Your faucet probably came with a hex wrench to tighten it.
Step 9: Next move onto the drain. Screw the nut all the way down on the drain body and push the gasket over it. Some gaskets are threaded and simply screw into place.
Step 10: Apply just a little bit of silicone under the flange. Position the drain body on the bottom of the sink- making sure the pivot hole is facing the back- and screw the flange on from the top side.
Step 11: Underneath, tighten the nut and gasket. On the top, use mineral spirits to clean up excess silicone.
Step 12: Install the drain rod next. Unscrew the pivot nut on the drain body, insert the horizontal rod through the hole in the stopper, and replace the nut. Push the horizontal rod down and secure the lift rod to the strap with the screw. Test the lift rod.
Step 13: Reconnect the supply lines to the faucet. If your sink is already in place, use a basin wrench to reach the faucet shanks.
Step 14: Flush the faucet by removing the aerator. This gets rid of debris or sediment in the faucet. Some faucets include a handy little tool to unscrew the aerator. When you’re done, keep it inside your vanity or with the rest of your tools. Turn on the hot and cold water for about a minute. Check all of the connections for leaks and retighten if necessary. Screw the aerator back on and you are done.
If you are in the market for a new kitchen or bathroom faucet, contact us at Plumbtile and we can help you pick from many options of quality kitchen and bathroom faucets for your home.
In most households, the kitchen is one of the most prominent rooms. It’s not just where food preparation happens. Often it’s where the eating occurs too, and where people tend to congregate.
If you’re having guests over, the kitchen is usually a focal point of the socializing. So it makes sense that people want to make sure everything in that room is perfect. This is especially true for the faucet, which could be said to be the centerpiece of the kitchen.
Before you purchase a new faucet, then, read the guide below for help in picking one you’ll be happy to use and proud to show off.
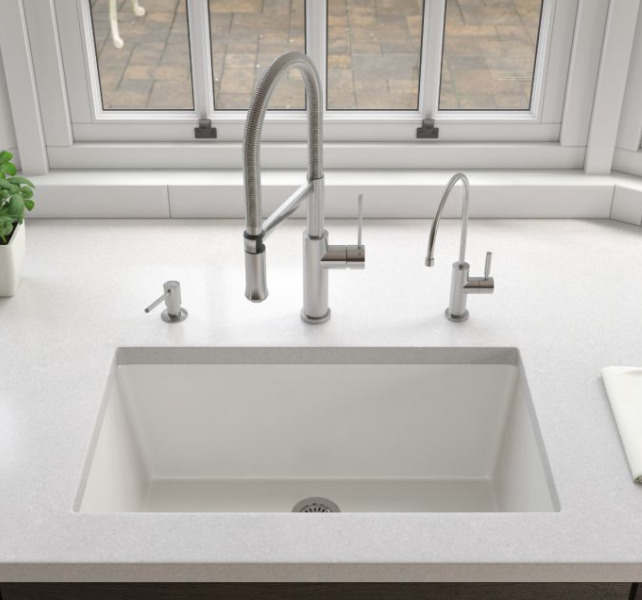
Is it time to update your kitchen sink but don’t know where to start in this process? Below is our step by step tutorial on installing kitchen sinks. Continue reading →
When you are remodeling your bathroom, you want to make sure everything is perfectly set. This means making sure all plumbing seals are good, all tiles are grouted properly but most importantly you waterproof the areas that have excessive water. In order to waterproof your shower, you will want to first mark your area. Make sure to properly measure your wall and mark out where you will be waterproofing. Once you have your area measured out you can mask off the section with masking tape. A good rule of thumb is to extend your waterproofing 100mm above your water outlet and 100mm wider than the edges of your shower. Continue reading →
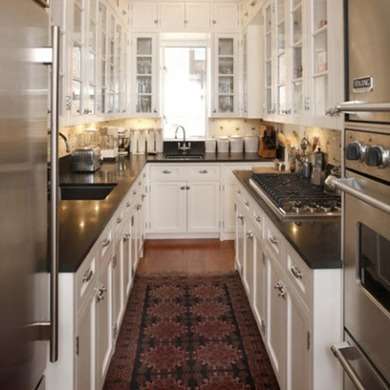 Make a U-Turn
This U-shaped galley kitchen takes full advantage of its ceiling height and the available light. The location of the sink provides views outdoors, while glass-front, white-painted cabinet doors help make the space feel open and generous. Continue reading →
![]() Sustainability is a big buzzword these days, but what exactly does it mean? Sustainability means meeting your current needs without having a negative impact on the needs of future generations. It also requires you to make environmentally-conscious choices about the way you live. It’s not really plausible for most of us to have a completely sustainable home — one that uses only nature’s infinite resources with no affect on the environment around us. But fortunately, there are some measures you can take to make your home more sustainable.
Sustainability is a big buzzword these days, but what exactly does it mean? Sustainability means meeting your current needs without having a negative impact on the needs of future generations. It also requires you to make environmentally-conscious choices about the way you live. It’s not really plausible for most of us to have a completely sustainable home — one that uses only nature’s infinite resources with no affect on the environment around us. But fortunately, there are some measures you can take to make your home more sustainable.
Your choices as a consumer greatly affect the sustainability of your home. Using rechargeable batteries limits the waste of items that often can’t be recycled. Buying paper products made with recycled content continues the chain of sustainability. Better yet, lose the paper towels and use a washable cloth. Biodegradable trash bags and cups are made of corn that dissolves over time, adding one less type of plastic to our landfills. And energy/water saver appliances can all help contribute to a more sustainable way of living.
In this particular blog we are going to highlight a particular brand that we at Plumbtile are proud to provide; California Faucets takes water sustainability very seriously! Read more below.

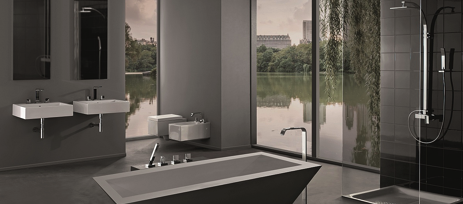
Do you often find yourself worrying about the stress of your day while you shower? Do you find yourself listing all of the things that have to be done, and the things that didn’t go as planned as the water falls all around you? Maybe it’s time for a different shower experience. With Hansgrohe, your daily shower can be the most relaxing part of your day.
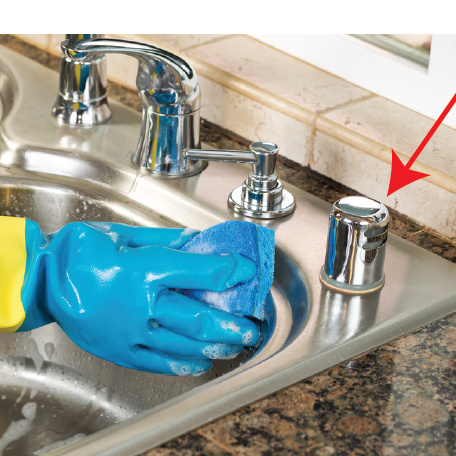
A clog in your kitchen sink drain could cause dirty water to back-flow into the dishwasher and contaminate the inside of the washer tub. Some municipalities require you install an air gap between your dishwasher and garbage disposal or sink drain to avoid such an occurrence. You can install an air gap in a single afternoon without the help of a plumber. Dishwasher air gap kits are available with everything needed for the air gap, but not the additional hose required to attach the gap to either the sink drain or the disposal.
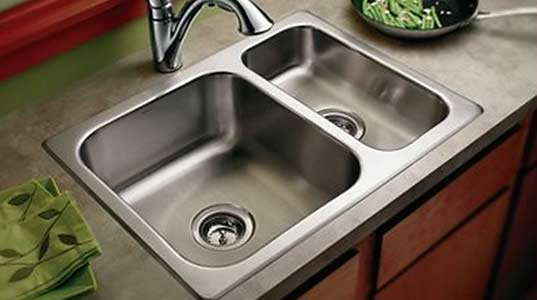
Adding a new attractive stainless steel kitchen sink to replace to old, dingy one that you’ve been looking at for too long, is a fairly easy do-it-yourself project. You’ll most likely need a drop-in, surface mounted sink. This will typically be of average difficulty to replace and you’ll need: a new sink of the same size opening that you are replacing, plumber’s putty/silicone caulk, an adjustable wrench, phillips and straight head screwdrivers, Teflon tape for threaded connections, new plumbing and drain parts as required. Continue reading →