Brighten Your Kitchen with Blue

http://www.housetohome.co.uk/

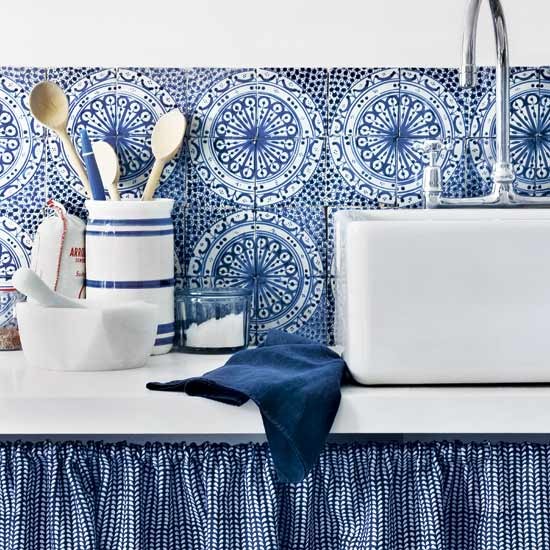
Are you looking for a way to brighten your kitchen? Bored with your color or theme of your kitchen? Then update to blue! The new trend for a bright kitchen is the use of using different shades blue. You can go traditional with blue and white, or vibrant with other primary colors like yellow and red as accents with your blue kitchen.  There are many styles you can choose to upgrade your new blue kitchen too.  Continue reading →

How to Install Tile to Bathroom Showers

0f808999f51cdd297d07a6749493baab

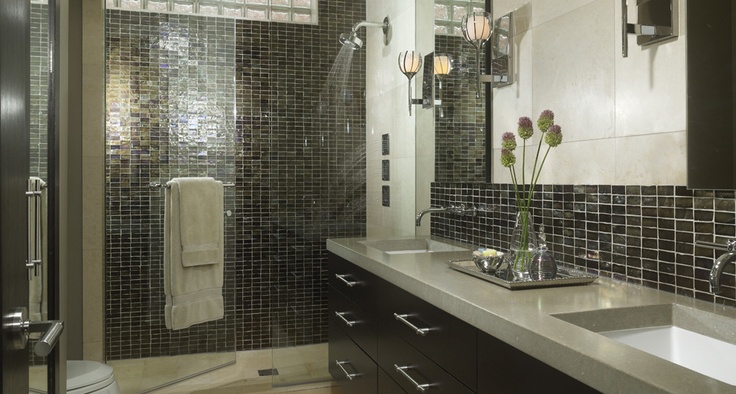
There are ten(10) easy steps to installing Tile in Bathroom Showers. Please use this blog as a guideline for your project.

1. Demolition/Preparedness: Upon the completion of demolition of the old tile, install a cement backer board in the shower area. In most cases you would have a professional install the shower membrane and shower pan appropriate for the space.  Continue reading →

How-To Series: March Ado About Toilets Part 2

all-about-toilets
Part 1 of our post was all about installing your new toilet.  This post is all about maintaining the pristine look of your brand new throne.

HOW TO CLEAN THE TOILET

[youtube https://www.youtube.com/watch?v=1zkADdWBXk8?rel=0]

  1. First put on clean gloves. Wipe down the toilet with a damp sponge. Then moisten a sponge with hot water and wipe around the tank, lid, seat, base, and the exterior of the bowl. This removes excess dirt and helps disperse the cleaning product.
  2. Squirt a liquid (cream) toilet cleaner inside the bowl., starting at the rim and making sure to get the area under the lip of the bowl. Read the manufacturer’s instructions first for specific directions. Many cleaners work best if you allow them to soak on the bowl for a while.
  3. Scrub the bowl with a toilet brush. Brush the entire bowl thoroughly, paying special attention to mineral stains that may accumulate along the water level and at the back of the bowl. The more thoroughly you scrub the bowl, the cleaner it will get.
  4. Flush the toilet. Flushing rinses the bowl and the brush. Continue to scrub as the water drains from the toilet. Repeat several times to thoroughly rinse the bowl and brush.
  5. Spray the rest of the toilet with a disinfectant cleaner. Follow the manufacturer’s directions. Make sure to get both the top and bottom of the seat, and spray the entire exterior of the toilet. Use a cloth or paper towel to work in, and wipe away, the cleaner.
  6. Clean the handle thoroughly. Be sure to get the handle with the disinfectant spray. The handle is the primary avenue for the spread of germs, so clean it well.
  7. Put on clean gloves and rinse off the items that were on or around the toilet. Replace items that were on or around the toilet. Wipe them dry with a paper towel and put them back in their places.

That was easy! Until next Thursday when we give you another toilet how-to!

divider

Toilets, bidets, urinals, handles, levers and more. Plumbtile.com carries the fullest array of toilets, bidets and accessories for both
home and commerical needs.

Our Bath and Home Improvement Showroom features toilet and bidet products from brand name manufacturers, Cifial, Danze, Duravit, Hastings, Herbeau, Kohler, Lacava, Porcher, Sterling, Sunrise and Toto.

With exceptional service, free shipping and guaranteed price matching, Plumbtile.com can make your home improvement or commercial building experience simpler and far less expensive. From the home renovation project to the commercial construction industry, no order is too small or too large.

Please feel free to call our sales
associates at any time or browse through the brands listed below:

1-866-369-8180


Toto Basins Faucets Furniture Toilets Tubs

Toto Toilets & Bidets

How-To Series: March Ado About Toilets

Since the start of the year we’ve been promoting remodeling every Thursdays, as well as our photo contest on Facebook. By the way, if you haven’t uploaded your bathroom or kitchen remodeling photos yet – go to Plumbtile’s Facebook page and look for the Photo Contest tab. You can also click this link: http://a.pgtb.me/4pnqmH to go straight to the contest! You can read the instructions there on how to win $1000 worth of bath and kitchen products.

The response to the Remodeling series has been positive and more and more readers have been asking about how to do specific remodeling stuff. We have decided to relaunch the Remodel Thursday series and focus on specific areas of remodeling.

This March, Plumbtile will be teaching you…

all-about-toilets

Today’s “how-to” is a back-to-back post about how to (1) install or replace a toilet bowl and its (2) proper maintenance. At Plumbtile, we have several brands that are easy to install- and with the help of our dependable sales consultants, you will be able to choose one that suits your style, budget and needs.

HOW TO INSTALL OR REPLACE THE TOILET

[youtube https://www.youtube.com/watch?v=Y_hVZ3rPzm4]

  1. The toilet flange (or the mounting base)  must be prepared first before starting this project. Depending on your bowl’s manufacturer, you need to align bolts (usually two) in the holes on the sides of the flange. Position these bolts directly across from each other. Follow the manufacturer’s instruction manual that come with your toilet bowl. Modern styles have different ways of mounting the flange.
  2. Then arrange the new toilet into place by placing a wax ring or gasket around the edge of the drain hole. Place the toilet on top of the wax ring, placing the bolts in the holes on the side of the toilet. Slowly press down until the toilet is seated flush with the floor.
  3. To install the new toilet, slide the washers over the bolts and tighten the nuts until snug. Do not over tighten or you can crack the ceramic. Apply the rubber gasket to the bottom of the tank. Set the bolts in the holes on the tank and set the tank on the back of the toilet bowl. Add washers and nuts to the bolts and tighten. Bolt the new toilet lid to the bowl with the bolts, washers and nuts.
  4. Connect the water line from the floor to the tank. Turn on the water and make sure there are no leaks.
  5. You can adjust the new toilet hardware by sawing off the extra length of the bolts protruding from the floor using a small hacksaw. Clip the plastic bolt caps into place. You may want to caulk the base of the bowl to create waterproof seal.Stuck? Read the full instructions here.

Click here for Part 2 – Maintaining your Toilet: Cleaning

divider

Toilets, bidets, urinals, handles, levers and more. Plumbtile.com carries the fullest array of toilets, bidets and accessories for both home and commerical needs.

Our Bath and Home Improvement Showroom features toilet and bidet products from brand name manufacturers, Cifial, Danze, Duravit, Hastings, Herbeau, Kohler, Lacava, Porcher, Sterling, Sunrise and Toto.

With exceptional service, free shipping and guaranteed price matching, Plumbtile.com can make your home improvement or commercial building experience simpler and far less expensive. From the home renovation project to the commercial construction industry, no order is too small or too large.

Please feel free to call our sales
associates at any time or browse through the brands listed below:

1-866-369-8180
New Year, New Remodeling Projects!

Looking to remodel your bathroom this year?

newIf so, here are 5 simple tips to help you to have a successful remodeling project.

  1. Remodel the bathroom, not the plumbing – Work with the design of your current bathroom.  Moving the plumbing gets into hours of labor and high costs. It can also cause damage and leaks.
  2. Keep the window open – Good ventilation during demolition is very important.  Wear a mask, keep the window open and even put a fan in the window blowing the dusty air to the outside if possible.
  3. Same Color Fixtures – Keep the sink, tub and toilet all the same color.  The uniformed look will help you to decorate around it.  Also keep the handles, towel rack and faucets all the same finish.
  4. Painting – Use High Gloss or Semi Gloss, acrylic, water based paint.  Do not use Flat or Satin finish.  Only use Oil Base if you are familiar with applying it because it can be difficult to work with.
  5. Education – Find a good, licensed contractor.  Look at their work, ask for references, etc.  If you are going to do the work yourself then take the time to read a book or watch a video.  That little bit of education can go a long way in saving you time and money.

Plumbtile is RELAUNCHING the Photo Contest.

WIN $1000.00 worth of products!

Here are the rules:

  • Take a photo of your recent project and submit it to us.
  • Then get all your friends to “Like” your remodeling photo.
  • The photo with the most likes will win $1,000 worth of bath and kitchen products.

For more information visit Plumbtile’s Facebook page.

How to Install a Glass Tile Kitchen Backsplash

Greasy or sauce-laden splashes are a pain to clean off of painted walls, but with a properly installed tile backsplash, cleanup is a breeze! Glass tile is a particularly good choice not only because it is beautiful, but is extremely stain resistant and wipes clean with little to no effort. Here is how to install a glass tile backsplash in your kitchen.

Continue reading →

How to Replace Your Kitchen Sink

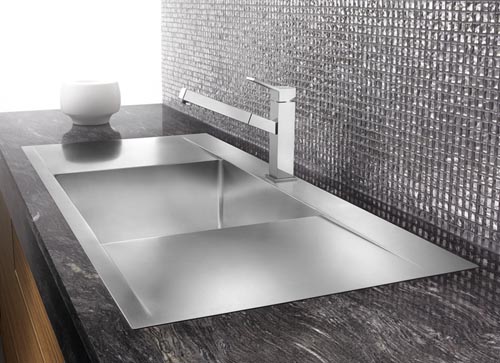
The kitchen sink sees constant use on a daily basis, and eventually will need to be replaced. Sometimes, you may want to replace the sink simply to upgrade, or to conserve more water. Whatever the reason, it is good to have a few tips in mind before you replace your sink. Here are some of Plumbtile’s top tips, as well as a how-to video for replacing your kitchen sink.

First, it is very important to take into account the type of function you wish to have, as well as the amount of work you are willing to do. If you currently have a single bowl sink and are looking to get a double bowl, there is going to be some work involved in cutting your counter top. This may even have to be done by a professional.

Of course, design is always a factor to consider as well. Many water-conserving sinks and faucets these days come in luxury finishes and designs, so it should not be hard to find one that fits your kitchen perfectly. You may even find that this upgrade makes your life much easier, with so many new developments in faucet design!

Once you have chosen the sink you want, you must know how to install it (if you are doing so yourself.)  We have found this video to be very helpful in showing you exactly what needs to be done.

[youtube=http://youtu.be/awEi4xoScn0]

If you’re still having trouble deciding which sink style and brand fits your needs best, be sure to speak to a trusted retailer to get expert advice and guidance. You will probably have this sink for many years, so make sure it is perfect for you!