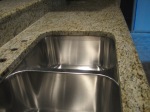
 This will be the final installment in our sinks series. Previously we have covered pedestal sinks and drop in sinks. The undermount sink is a practical version that’s easier to install than most people think. Once installed, it allows a seamless surface for your counter, allow you to sweep up mess directly into the sink without it catching on any lip.
Just like our drop-in sink, a hole in your counter must be drilled from the template. Follow the instruction in our drop-in how-to and then come back here.
After the hole has been drilled, lay a thick piece of wood horizontally over it. Using a long clamp, have one end hang on the wood piece and the other brace through the drain hole (use two clamps if there are two drains). Check to see if the sink conforms perfectly to your cut out hole. Adjust the placement and mark on the underside of the counter where the drill holes will go through your mounting brackets (some sinks don’t have brackets or clip and are drilled directly through. Use wingnuts if this is the case).
Loosen the clamps holding the sink. Pour denatured alcohol onto a clean rag and wipe the rim of the sink thoroughly. Then squeeze a bead of silicone caulk all the way around the sink ridge. Tighten the clamps securely and wipe away any excess squeezed out. Drill your screws in through the mounting clips/brackets. Tighten winguts over the ends of these screws. Leave your clamps on overnight.
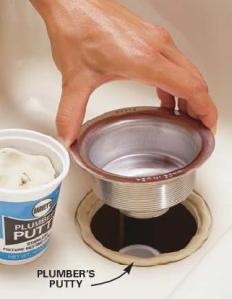
Roll some plumber’s putty into a ¾ inch wide line and wrap it around the underside of the drain. Attach the drain with its washers and gaskets and tighten by hand. Wipe away any excess putty with a soft cloth. Put a little pipe joint compound on the drain’s exposed threads and thread the locknut onto them. Use a wrench or pliers to tighten the components underneath the sink while holding the drain in place with your hand.
Drill holes with a inch and a quarter coring bit. Make sure your holes match the layout of your faucet. Some faucets may need three holes, but connect the spout and handles with a baseplate. Mark your holes and then drill after measuring. While your surface clean before the next step.
Using the same method with the plumber’s putty, make a rope for the faucet holes. Install the faucet and handles- pull the water lines up through the holes drilled and connect with a braided water line hose. Flush the supply lines into a bucket to clear lubricant, debris and sealer. Tighten the compression nut to the water line. Let everything sit for 24 hours before you fill your sink with water.
Watch this vid as a quick recap:
[youtube=http://www.youtube.com/watch?v=4kO8FC0xI2k&hl=en_US&fs=1&]


