There are ten(10) easy steps to installing Tile in Bathroom Showers. Please use this blog as a guideline for your project.
1. Demolition/Preparedness: Upon the completion of demolition of the old tile, install a cement backer board in the shower area. In most cases you would have a professional install the shower membrane and shower pan appropriate for the space.

(Photo Source: Apartment Therapy.com)
2. Selecting Tile Size: Most contractors use two types of standard bathroom tile sizes, 2×2″ or 2×4″ tiles, which come on pre-spaced on mats. On the ceiling and floor of the shower, its best to use 2×2″ tiles and on shower walls its best to use 2×4″ tiles. Before you decide what you want where, start setting the tiles, and in the process take some measurements and see how the tiles will all lay out. After you set the tiles, begin to dry lay the tile panels, including any decorative borders, to see the way it’s going to set vertically on the wall. This allows you to see how many panels can fit, where you need to make cuts and where you should start setting. Lastly, you’ll need to get an accurate measurement, space out exactly how you will set the panels and after dry laying each segment, determine the best place to start setting tiles working from bottom to top.
3. Starter Board Introduction: Use a starter board as a straight edge whenever you do a vertical tile installation to ensure that each of the panels are straight and level. (Keeping the tiles straight and level makes the job look clean and level, which become key selling points down the line). You’ll want to screw the starter board directly into the cement board and remove it after completing a series of panels, after which you’ll then make sure the board is level before starting to set panels along this edge.
Once the board is level you’ll next use a notched trowel to spread the thinset which creates a suction to hold the stone in place as the mortar dries. Place the panel onto the thinset using the starter as a guide. Use a level to make sure tiles are straight. Once in place, push the tiles evenly into the thinset. Use your hands or a grout float to apply pressure. Without pressure the tiles have a chance to skew and slide. Wipe the tiles with water and a clean sponge as you set them, checking each row so that they are level before you set the next one.
4. Getting Around the Shower Door: When it comes to working around the door you’ll want to measure the width of the shower walls on either side of the door. Next you’ll, dry lay the panels and measure them to see where you need to make cuts. Set the tile panels on the side walls with thinset, similar to the way you had done so for the back wall by using the starter board. Clean the tiles with a sponge and water as you work. At the corner where there are gaps, fill in the spaces with the previously cut tiles.
5. Making Wet Saw Cuts: Once you finish setting the panels and making sure they are level, make cuts for the edges of the walls. Use a wet saw to prevent tile from breaking or splitting. Mark the tiles with a pencil where cuts are needed. Hold the piece firmly in place and gently slide it under the wet saw blade.

(Photo Source: How To Specialist.com)
6. Use A Sanding Stone to Smooth The Edges Out: Most of the cut pieces will have a straight edge that will contrast with the tumbled marble look of the tiles when set against the exposed edge of the shower wall.In order to prevent this from happening, use a sanding stone to soften the edge, rendering a tumbled look. After that, you’ll set these cut pieces individually along the edge, using the same thinset as before, making sure the pieces line up straight with the outside edge.
7. Creating A Border: Most contractors tend to create a decorative 3″ to 4″ mosaic border at the top of the shower walls between the second and third panel from the top, in an effort to add some visual (and very creative) context to the project. Because the border tiles tend to be thicker than the other tiles, you’re going to apply a thinner layer of thinset.

(Photo Source: WeddingBee.com)
8. Finishing Up Your Tile Sets: When you’re almost finished setting the tiles on all sides of the shower with thinset, you’ll want to check back over your work. If you find that you’ve applied too much thinset and it begins to come through the joints, simply a screwdriver and scrape the excess thinset out, wiping clean the area of any excess with a wet sponge. Be sure to complete this before the extra thinset dries, if you aren’t on top of it you’ll have a difficult time removing it and most likely it will not match the color of the grout.
9. Finishing Up The Shower Floor: One of the last things to do is to finish setting the shower floor with thinset. The shower floors are tiled with the 2×2″ tiles and setting the floor tiles is the same as the walls: you’ll thinset on the floor, and then slide tiles into place and pat them down with the rubber grout float. If the floor has been poured perfectly, you don’t have to worry about the pitch because all of that work has been completed for you already. When it comes to the angled tiles around the drain, you will need to use a special tool to get the right shape. Mark the tile where you need to cut it. Use a tile nipper and chip away at the mark, and although a bit time consuming the tile nipper does a great job.
10. Applying The Grout: When the tile has set, mix the grout for the shower walls. Use a mix of 75 percent sanded grout and 25 percent non-sanded grout, both of which are available at your local Home Depot or Lowe’s. Sanded grout, which in most cases, is difficult to get into small joints, can be mixed non-sanded grout, since the non-sanded grout helps thin out the sanded grout, so it can be applied a bit more easily on walls.
Lastly, you’ll want to use a rubber float to apply the grout by starting at the bottom and work your way up, keeping the float at an angle to the joints. Once all the joints in a section are filled, let them dry for a little while (20-30 minutes), then wipe the grout off the surface with a sponge and clean water.Once the tiles have been cleaned allow them several hours to set and dry.
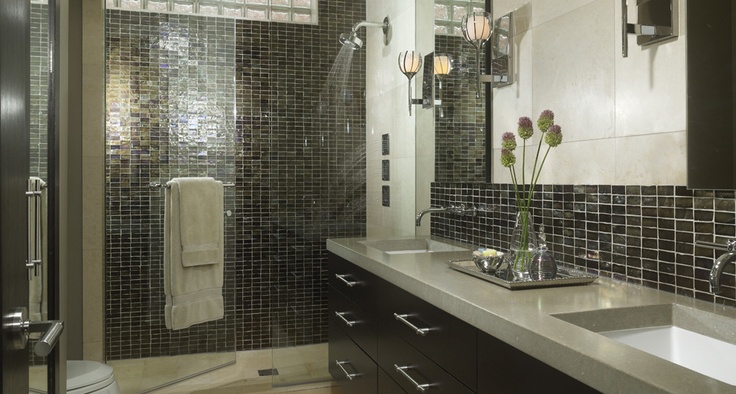
Your finished product should look something like this:
