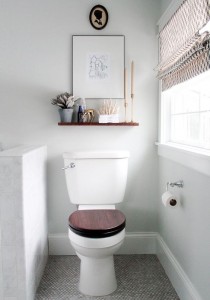
 Are you in need of a toilet replacement, but don’t want to spend the money on buying a new toilet and hiring someone to put it in for you? Fear not, below you will find step-by-step instructions on how to install your new toilet to complete your bathroom.
Step 1: Remove the old toilet
Turn off the water at the shutoff valve located either on the wall or floor behind or beside the toilet. Flush the toilet to ensure that all of the water is drained from the tank and the toilet bowl. If there is any remaining water, use a plunger to force it down the drain line and then remove any remaining water from the tank with a sponge and bucket.
Step 2: Disconnect the supply line:
Use an adjustable wrench to disconnect the supply line. If the line has never been removed or has been connected for an extended amount of time, it might a little harder to loosen at one or both of the connection points. Keep the water pipe secure while trying o lose the supply line at the valve. Do not loosen or damage the water pipe or its connection inside the wall or floor in process of trying to loosen the supply line connection.
Step 3: Lifting the tank and toilet bowl:
Disconnect and remove the tank from the bowl by removing the bolts from the bottom of the tank with an adjustable wrench. The tank bolts travel from inside the toilet tank to below the bowl. Remove the tank by lifting it straight up. If you feel resistance, twist from side to side as you lift.
Step 4: Unbolt the tank and toilet bowl from the floor:
Pop the toilet bolt caps and use a screwdriver if necessary. Use a pair of pliers or an adjustable wrench to remove the nuts and washers on the bolts that secure the bowl to the floor. If you find the nuts are rusted in place, you can use PB Blaster penetrating catalyst to loosen the nuts.
Step 5: Check for caulking around the bowl base:
Check to see if your toilet bowl has been caulked around the base where it meets the floor. If it had, you will need to use a utility knife to score through the caulk seem. For your new toilet, avoid caulking around the base. Gently rock the toilet bowl back and forth until you work it free and can lift it.
Step 6: Check the bolt around the flange:
Check the state of the old toilet bowl bolts in the flange located at the floor drain. If you cut rusted bolts off, those bolts should be replaced at this point with new bolts that came with the new toilet. Remove the old wax ring using a putty knife and wipe away an access with a damp rag or sponge. Stuff a rug into the open line in the floor. This will prevent sewer gases from venting into your home.
Step 7: Inspect the flange for damage:
If the flange is cracked or broken, use a flange repair ring.
Step 8: Place the new wax ring:
You have two options for a new wax ring:
- You can rest the new toilet bowl on its side on a padded surface to protect the floor and the toilet and attach the replacement wax ring to the bottom of the bowl.
- Place the wax ring in position on the flange prior to lowering the bowl into place.
Step 9: Place the bowl on the flange:
Place the toilet bowl onto the flange, aligning the bolt holes in the base of the bowl with the bolts in the flange. If it helps, you can hold the bowl by the inside rim instead of the outer edged to get a better grip and more control as you lower it. Press down to set the seal.
Step 10: Secure the toilet:
Place a washer and nut on each toilet bowl bolt and evenly tighten the nuts onto the bolts. Alternate from one side of the toilet to the other as you tighten the nuts a little at a time. Be careful not to over-tighten the nuts and crack the porcelain bowl. If the bolts extend too far over the top of the washers and nuts, cut off the excess with a hacksaw. Place the tank onto the bowl, aligning the shank of the bolts with the boles in the bowl. If the bolts extend too far over the washers and nuts, cut off the excess with a hacksaw.
Step 11: Attach the tank to the toilet bowl:
Place the tank on the floor. If not already attached, install the “tank to bowl” gasket onto the base of the flush valve and insert the tank bolts and washers from inside the tank. Place the tank onto the bowl, aligning the shank of the bolts with the holes in the bowl. Secure the tank to the bowl by alternately tightening each tank bolt until the tank pulls down and comes in contact with the bowl. Reattach the supply line to the exposed portion of the fill valve sticking out of the bottom of the tank and to the supply valve coming out of the wall or floor. Test the toilet for leaks by slowly turning off your old water supply valve, and allow the tank to fill.
Step 12: Choose a toilet seat!