Before you start cleaning or staining your wood deck, you will want to perform a water test. A water test is the easiest way to ensure that the wood can absorb sealer or finish. Sprinkle some water on the deck and if it soaks in immediately, the deck can be sealed. If the water beads up or stands on the deck, your deck may not need sealing yet.
UV rays penetrate the wood, which causes graying. Deck cleaners help to remove dirt, nail stains, algae and mildew. If your deck isn’t brand-new, always use a cleaner before applying finish. Lack of preparation is the most common reason for deck stains and sealer to fail. Don’t skip out on this important step.
- Step 1: Remove all deck furniture and other furnishings.
- Step 2: Sand splintered areas with a pole sander with 80-grit paper. Repair or replace any damaged boards. Make sure to drive in any popped nails first- or even better, replace them with deck screws.
- Step 3: Sweep off loose debris and clean between the cracks of the boards with a putty knife.
- Step 4: Wet surrounding pants and shrubs. Then over them with clean plastic sheeting to prevent spotting with chemicals. Also, cover siding with plastic or paper before staining.
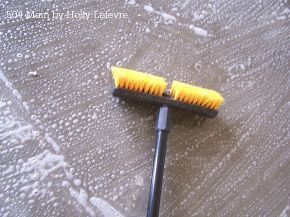
- Step 5: Use a paint roller with an extension handle, a garden sprayer or a stiff-bristles push broom to apply cleaner to the entire deck. Don’t allow cleaner to puddle in any area.
- Step 6: Keep the deck wet with cleaner. Don’t allow the cleaners to dry. Speed up the process by having one person apply the cleaner and another person back-roll the deck. Back-rolling is a process in which one person uses a roller or broom to spread any puddles.
- Step 7: Scrub tough areas with a stiff brush or brrom. Avoid using wire brushes or brooms. The bristles can break off into the wood and cause rust spots.
- Step 8: Allow the cleaner to soak into the wood. Soaking time is no more than 10 minutes, but always check the product instructions.
- Step 9: Rinse the deck thoroughly with a garden hose or pressure washer.
- Step 10: Wash equipment with soapy water. Rinse plastic sheeting with water and remove.
- Step 11: Allow deck to dry at least two days before applying a sealer.
Applying a Stain or Sealer
- Step 1: Check the weather. Try to find at least two days of dry weather with temperatures between 50 and 90 degrees Fahrenheit.
- Step 2: Remove all deck furniture, plants, and furnishings.
- Step 3: The entire deck may require sanding with a pole sander or palm sander to speed up the process. Sand in the direction of the grain. Be sure to wear a safety mask so you won’t inhale the sawdust. Drive in popped nails or replace them with deck screws. Replace any damaged boards.
- Step 4: Sweep off loose debris and clean between the cracks. Make sure the deck is dry.
- Step 5: Wet surrounding plants and shrubs and cover them with clear plastic sheeting to protect them. Also cover siding with plastic or paper before staining.
- Step 6: Stir the sealer or stain thoroughly. Don’t shake sealer. Bubbles will form in the finish.
- Step 7: Apply a thin, even coat of the sealer or stain over a two- to three-board section with a paint roller with an extension handle or sprayer. Two thin coats are better than one thick coat that doesn’t properly adhere or dry. Don’t allow the finish to puddle. To speed up the process, one person applies the stain or sealer and another person uses a roller or broom to spread puddles and to work the finish into the wood, a process known as back-rolling.
- Step 8: Repeat the above process for the entire deck. Use a paintbrush to apply the sealer or stain in corners and other difficult areas, such as steps, railings, end grain, and cracks. A second coat is optional.
- Step 9: Rinse the plastic covering the plants with a hose and remove it.
- Step 10: Allow the deck to dry completely.