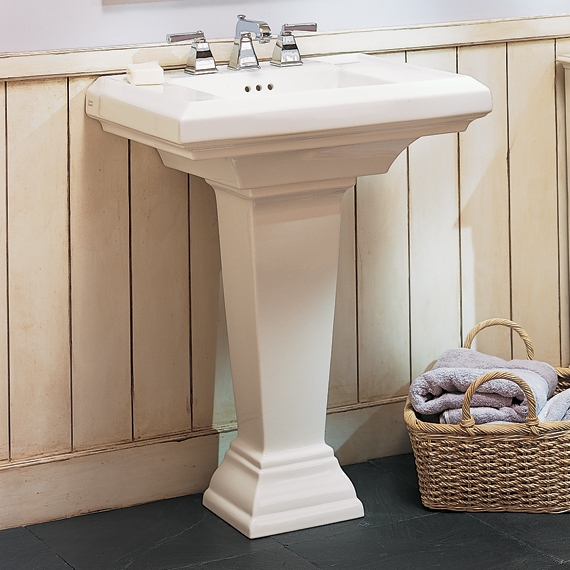
Installing a pedestal sink is a quick way to add elegance to your bathroom. This classic look has been around for over a hundred years and still a sought-after style in bathrooms. They are slightly more complicated to install than a standard sink, but we can help walk you through the process with our steps.
Tools:
- Hacksaw
- Basin wrench
- Socket wrench
- Slotted screwdriver
- Level
- Drill and bit
- Tape measure
- Propane torch
- Water pump pliers
- Compact tubing cutter
- Tubing cutter w/reaming blade
Materials:
- Pedestal Sink
- Lead free solder
- Flux
- Fine grit sandpaper
- Fender washers
- 2 ½ inch lag screws
- Bucket
- Rag
- Plumber’s tape
- Plumber’s putty
Step by Step Instructions:
1. You’ll need at least two inches of rough plumbing from your supply lines. If it’s longer than that you’ll need to trim them down.
First, shut off the main water supply and empty your supply lines into your bucket. Leave the bucket underneath your supply lines.
Using your compact tubing cutter, cut your supply lines 2 inches from the wall. Be careful to not warp the soft metal. You can avoid this by tightening the cutter after each turn around the pipe.
Figure out where you want to place your pedestal sink. Mark on your waste pipe where the center of the drain will sit. Then use your P-trap with its elbow already on and mark where it extends to on the waste pipe. Use your hacksaw to cut the waste pipe at this mark.
2. Use the reaming blade on the tube cutter to ream the inside edges of the copper supply lines- this removes burrs left by the cutter. Then polish the ends with sandpaper until they’re shiny. Coat the outside of the lines with flux.
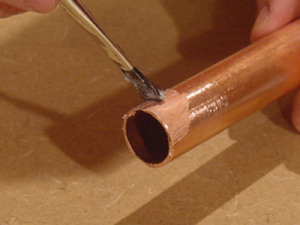
Now polish and spread flux on the inside of the angle stops for your supply lines, then install them with their escutcheons.
Adjust your propane torch to emit a hot blue flame and heat where the stop ends and the supply line begins. Start placing your lead-free solder here and when it starts to melt, turn off your torch and run it around the pipe. Once it’s cooled some, wipe it smooth with a damp rag. Remove any flux as well, as it will corrode your copper pipes.
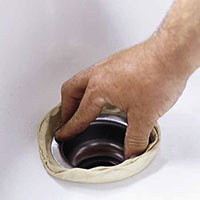 3. Line the underside of the pop-up drain with plumber’s putty and firmly place it in the basin’s drain hole. Underneath the sink, put a gasket and washer on the drain’s threads. Use your water pump pliers to tighten the gasket and washer firmly in place.
4. Position your pedestal so that it lines up with the waste pipe and then place the basin on top. Check the basin with a level.
Mark with a pencil through the mounting holes where to drill the lag screws that will hold the unit to the wall.
5. Move the pedestal away from the wall and have a helper hold the basin and pedestal together.
Fit the P-trap onto the waste pipe and mark the open vertical end on the pop-up waste assembly. Remove the elbow and place the slip-nut and washer over the pop-up waste assembly’s tailpiece. Use plumber’s tape on the P-trap’s vertical threads and slide it up to the mark on the tailpiece. Tighten the nut by hand, and then with water pump pliers.
Drill in your lag screw holes at your marks on the wall.
6. If your faucet came with O-rings, place them underneath the faucet’s valve and spout and then insert each piece into their holes in the basin. Use plumber’s putty if no O-rings came with your faucet.
Place a gasket and nut under each part of the faucet, and tighten with a basin wrench. Now play the sink against the wall, lined up with holes you drilled in the previous step. Screw in the lag screws with fender washers through the mounting holes and use a socket wrench to tighten. Check your basin with a level and adjust accordingly.
7. Attach the elbow to the P-trap with a washer in between, use plumber’s tape on the threads and tighten with your water pump pliers.
Measure out the distance between your angle stops and their faucet valves, and cut a supply line of that length with an extra inch using your tubing cutter.
Slide on two compression nuts and a ferrule over the cut end. Tighten one nut at the end with a wrench, then bend the supply tube slightly to the side then back up so its acorn head fits into your valve. If you kink either of the lines, you’ll have to cut a new one and start over. Use the 2nd compression nut to firmly attach the valve and the supply line.
With the lift rod in the “up” position, attach the pop-up stopper to the actuator arm, and then attach the lift rod to the arm with the screw provided.
Finally, put the escutcheon for the waste pipe on along with the cover.
8. Make sure the faucet handles are in the “off” position and turn your water supply back on. Remove the aerator and open up one faucet valve to clear our air and work debris. Turn off this faucet and repeat for the other one. Check for leaks after clearing each line. Reattach your aerator. If your sink does not have bolt holes, apply adhesive caulk around the base. If it has bolt holes, make sure it’s aligned with the basin properly, and use a pencil to mark where it will be bolted. Pre-drill the holes with a bit that’s smaller than the bolts, replace the pedestal and tighten with a socket wrench.
Congratulations! You’ve now securely installed a new pedestal sink in your bathroom.