Ever wished you had an eye catching backsplash in your kitchen, but just not sure where to start? Use this helpful guide to help you install the kitchen backsplash you have always wanted, and take a step in revamping your kitchen.
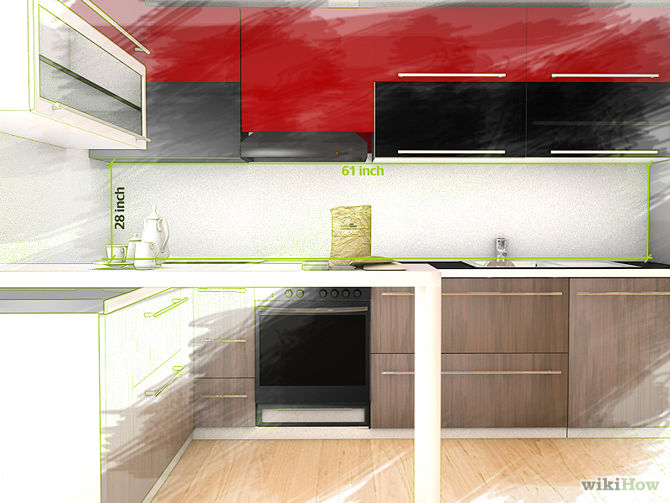
First things first, measure the space you want to cover in tile, and make sure you have purchased enough tile to cover the whole space. Also gather all the tiling supplies you will need:
- tile
- tile adhesive
- grout
- notched trowel
- tape measure
- sponge
- level
- utility knife
- tile cutter
- cloth to cover your counters
1) Start by thoroughly cleaning your walls. Tile won’t stick to dirty walls, so make sure you do a very good job of preparing your wall surface by pre cleaning.
2) Next measure your space and decide where on the wall you are going to stop the backsplash and use a level and straight edge to mark the line where you will stop.
3) Start applying tile adhesive to your wall in a small section (a large section will dry before you can lay the tiles) working from the bottom center outward.
4) Firmly place your tile on the wall, starting at the bottom center moving outward. Press each tile a few times to make sure you have securely attached it to the wall. If the tiles are not attached together, use a spacer to ensure the correct spacing.
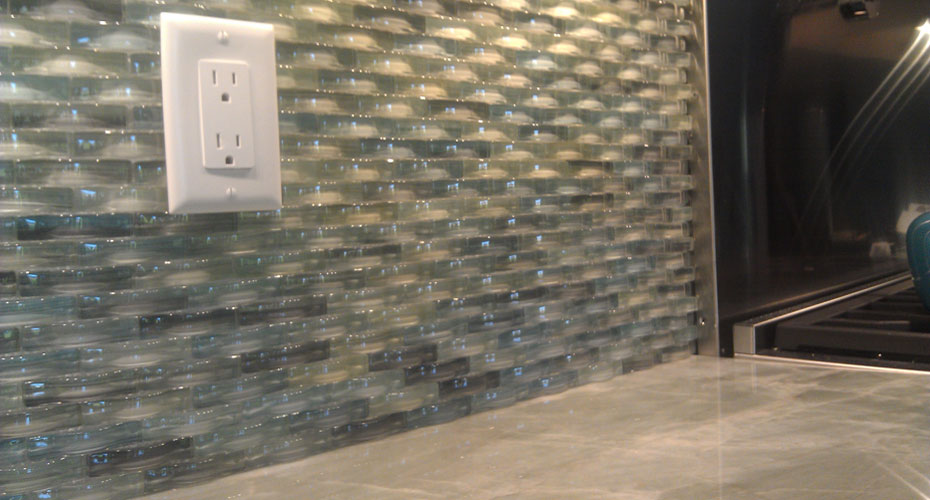
5) Repeat step four until the whole wall is covered, up to the stopping line you made earlier. Make sure to cut tiles to fit around outlets, and to fill the gaps at the end of the walls. This is what your tile cutter is for.
6) Apply grout, using your cleaned off trowel, sweeping it in a downward 45 degree angle. Don’t worry about covering the tile. Let the grout set for a few minutes, once it has set, wipe the excess grout off the tile. At this point, all the space between tiles should be filled, and the excess should be wiped off.
7) Add a small line of caulk to the bottom of the wall to seal your tiles and prevent mildew.
Enjoy your new kitchen backsplash!