
Are you bored with the look of your kitchen? Are your countertops showing all the wear and tear of preparing and cooking your meals? What you can do is give your kitchen a new makeover with the simple task; install new kitchen countertops!
Step 1: Choose a Material for the Countertop
This project is for installing granite countertops, which may call for consulting with a professional for help on certain aspects. Some countertops are best left to the pros, who have the proper tools and technology and will measure and cut these large pieces with laser precision. But countertops can be made of many materials and once correctly cut are installed using the same steps. Once you decide what materials you are going to use for your countertops, check with the manufacturer for their suggested installation techniques.
Step 2: Measure the Space
Prepare for the countertops by measuring the cabinet layout and making a template to follow for later installation. Get hard measurements on things that are square and plumb, and soft measurements for areas that may need adjusting, such as the sink). Allow an inch to an inch and a half for the overhang of the countertop on islands and exposed edges of cabinets. For pieces that will butt up against large appliances, subtract 1/16th of an inch to allow for easy install and removal. If you’ve enlisted the help of professionals for installation, they will likely do the measuring themselves.
Step 3: Cut the Countertop Material
With your measurements, either cut the materials yourself, or make sure you’ve provided your chosen professionals with the correct measurements so they can cut the material. Remove cabinet drawers for a faster install process.
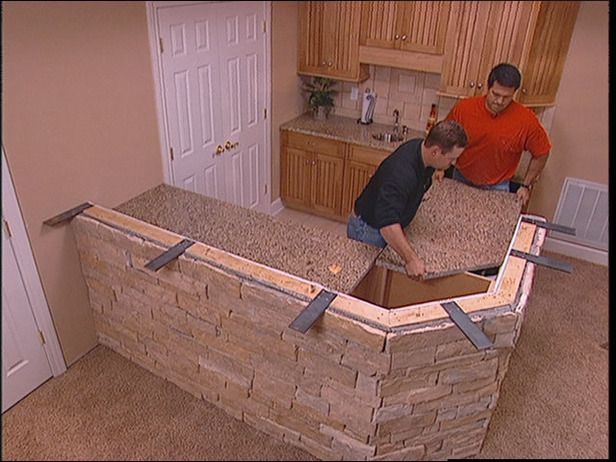
Step 4: Place the New Countertop
Once you’ve measured and prepped the cabinets, carefully bring your countertop material inside and place it onto the designated cabinet or island top and make sure they fit properly into place. This serves as a dry fit to make sure all of the pieces were cut properly before adhering anything to your countertops. After setting the countertops in place, check for level and shim any necessary areas. This step will be dependent on what materials you’ve chosen for your countertops.
Step 5: Adhere the Countertop
When all pieces are level, secure your countertop with your manufacturer’s preferred adhesive. On some materials, such as granite, there is a temporary sealant to be applied prior to (but in conjunction with) using the stronger adhesives. When attaching stone to wood, use a silicone adhesive to adhere the granite to the wood cabinets. This gives proper cushioning and provides enough strength to keep the granite in place. Continue to adhere all countertops to cabinets and island.
Step 6: Seal the Seams
After securing your countertop into place, seal the seams with color-matching silicone. If one side is higher, knock it down into place while protecting the countertop material. Give it a final seal with spray sealant. (Type of sealant depends on materials and manufacturer’s suggestions.) Remove any excess sealant with solvent and carefully cut away any excess that isn’t easily removable. After completing the countertop installation, replace cabinet drawers.
So, let’s get started. Let’s start at Plumbtile.com.