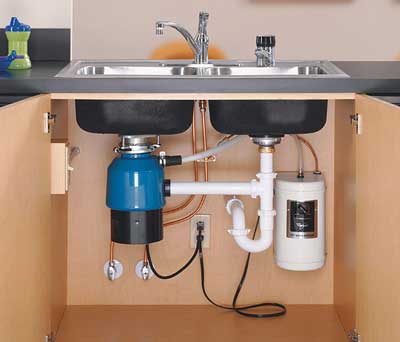
 (Photo Source: Rooterexpertsca.com)
Clogged garbage disposal? Repair quotes a bit much for your pockets? In five easy steps, you can fix a non working disposal and be back in business in no time with still some extra change in your pocket….
1. Wire the Disposer. The disposer may come with the appliance cord attached. If not, you will have to connect one. Remove the cover plate beneath the disposer. Most cords and disposers have the same colored wires. Connect white to white, black to black, and the green wire to the disposer’s ground screw. If the colors are different, read the manufacturer’s instructions for wiring.
2. Apply Plumber’s Putty. Press a rope of plumber’s putty onto the underside of the drain flange. Insert the flange into the drain hole and press down evenly. Install the backup ring, fiber gasket and mounting ring from beneath the sink.
3. Install the Mounting Ring. Tighten the mounting screws for the upper mounting ring. Alternate the tightening of the screws to pull the ring up evenly against the sink.
4. Mount the Disposer. Place the disposer into the mounting ring. Make sure the outlet of the disposer is facing the drain pipe connection. Turn the lower ring clockwise until the disposer is supported by the mounting assembly.
5. Connect the Outlet to the P-Trap. Use a hacksaw or tubing cutters to measure the discharge pipe and cut it to length. Install the discharge pipe to the outlet of the disposer. Attach to the drain line with slip nuts.
6. Tighten the Mounting Lug. Insert a screwdriver or disposer wrench into the mounting lug on the lower mounting ring. Turn clockwise until the disposer is locked into place. Tighten all slip nuts snug using water-pump pliers. Run water into the sink. Turn on the disposer and check for leaks. Tighten fittings if necessary.
