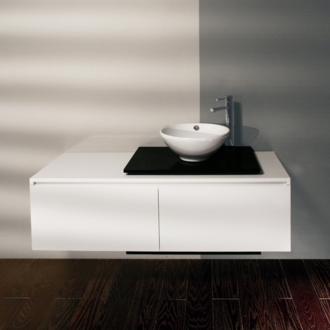
 Lacava – Wall mounted cabinet with two drawers
Tired of looking down at that old base cabinet you had in your bathroom since you moved in? Why not try to installing new modernize cabinets to add a little more spark to that room using just eight steps. Wow your friends and family with this try-it-yourself base cabinet project.
1. Put the corner cabinet – in this case, a blind corner cabinet – in place. Leave a space between the cabinet and wall as recommended by the cabinet manufacturer (required for some corner cabinets).
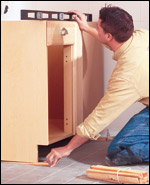
(Photo Source: Homedepot.com)
Shim beneath the cabinet to align it with the top-of-cabinet line you drew on the wall.Check for level and plumb, and add additional shims as necessary. The corner cabinet sets the trend for all of your other base cabinets, so take the time to this step well.
Hint: The toe-kick, other cabinets, and counter top that you’ll install later will hide your shims, so it’s OK to leave them sticking out for now.
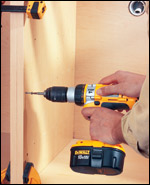
2. Drill and countersink pilot holes into the back of the corner cabinet. Drill one hole at each stud, through any shims. Drive screws partway into the wall. Check for level again, shim as necessary, and drive the screws home.
3. Set the neighboring cabinet in place. Install doors or drawers, and verify that they’ll open. If necessary, attach a filler strip between the cabinets. You can usually order the fillers at the same time as your cabinets. Clamp the filler flush with the front of the cabinet. Drill and countersink pilot holes into the edge of the filler and screw the filler to the cabinet.

(Photo Source: Homedepot.com)
4. Check the second cabinet for level and plumb. Shim at the floor or wall if necessary. You will now begin assembling the row of base cabinets, making any cutouts for plumbing or wiring, as in Step Five.
5. Before you install the sink cabinet, drill and cut holes for any wiring and the pipes. Measure how far they are from the adjoining cabinet. Subtract the thickness of the side of the sink cabinet, and mark the pipe locations on the cabinets. Drill at the marks with a spade bit or hole saw to cut holes for the pipes.
6. Install the remaining base cabinets. Check for level and plumb, shimming as you go. When all cabinets are in position, step back and check the entire set for alignment, level and plumb before proceeding.
7. When all cabinets are in the proper place, drill and countersink pilot holes. Attach the cabinets to the studs with at least two screws in each mounting rail. Attach the cabinets to each other with at least four drywall screws. Once all cabinets are securely in place, trim off the exposed shims with a utility knife.
(Photo Source: Homedepot.com)
8. Install a toe-kick to cover the gap along the bottom. This is often a two-step process: First nail a plain 3/4-inch filler strip in place; then attach a thinner piece that is finished to match the cabinet. Use a pneumatic brad nailer, or drill pilot holes and drive 4d finishing nails through the toe-kick into the cabinets.