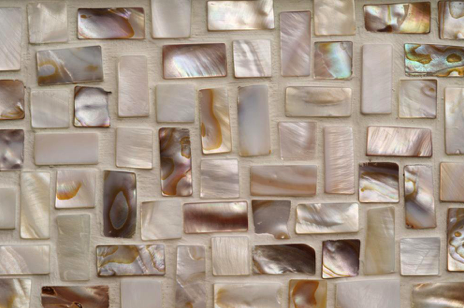
Have you ever looked at a mosaic tile piece and thought “I could do that?” Well yes you can! It is easier than you think and costs next to nothing to make because if you have a tile floor you have the tile you need. If you do not have the tile you can get a box of inexpensive tile at the store.
Here are just a few simple steps to create your own work of art:
- Take any of your left over ceramic or porcelain tile, cover with a cloth or towel and take a hammer and slowly start to break up the tile into pieces.
- Once you have small enough pieces to work with now you can start laying out your pattern. If you have tiled your floor but left blank spaces to work with start laying the pieces in that space until you get them set the way you want them. If you are more adventurous and have a design you want to use then you can transfer that design to the floor and fill in the design.
- To transfer to the floor, it can be as easy as taking a heavy charcoal pencil, color the back heavy then lay it in the spot carefully and trace the pattern onto that spot. Be careful when you lay the paper down and pick it back up as to not smudge the area. You can go over any faint lines with the charcoal to make sure your pattern is easy to see.
- Try to keep the grout joints (space between the tiles) close, if you have spall spaces use a sanded grout if you have larger spaces use un-sanded grout to keep from cracking as it is drying. If you are able to find factory edge to use as an edge that will make things easier.
- Before you grout make sure you have all the tiles placed and laid out. Once you it all laid out slowly lift the tile one piece at a time and add thin set to the bottom to hold in place. If you get the thin set on the top of the tile just wipe it off before it dries. Let the tile sit overnight before grouting.
- Now it is time to grout. Grout is sold mixed and premixed get whichever you are comfortable using and since you also have to seal the grout after you can add the sealer into the grout eliminating that step. Allow to set about 20 minutes, take a damp wiping the area top to bottom the flip the sponge over and wipe it left to right then rinse the sponge and work on a different area until the entire surface it completed.
Give the tile 24-48 hours to set and harden before walking on it. Stand back and enjoy your masterpiece! Now that you have the hang of this you can look at adding a mosaic to anything, tables, lamps, planters…the sky is the limit!
But if you do not have the time to make your own mosaic tiles, stop by and see our large selection of mosaic tiles at Plumbtile!