This week we are featuring Watermark Linear shower drain and how to install them. See below for step by step instructions and video.
Watermark – linear shower drain with various design grates.
Installation options:
- Rubber Gasket
- Threaded Collar
- No-Hub
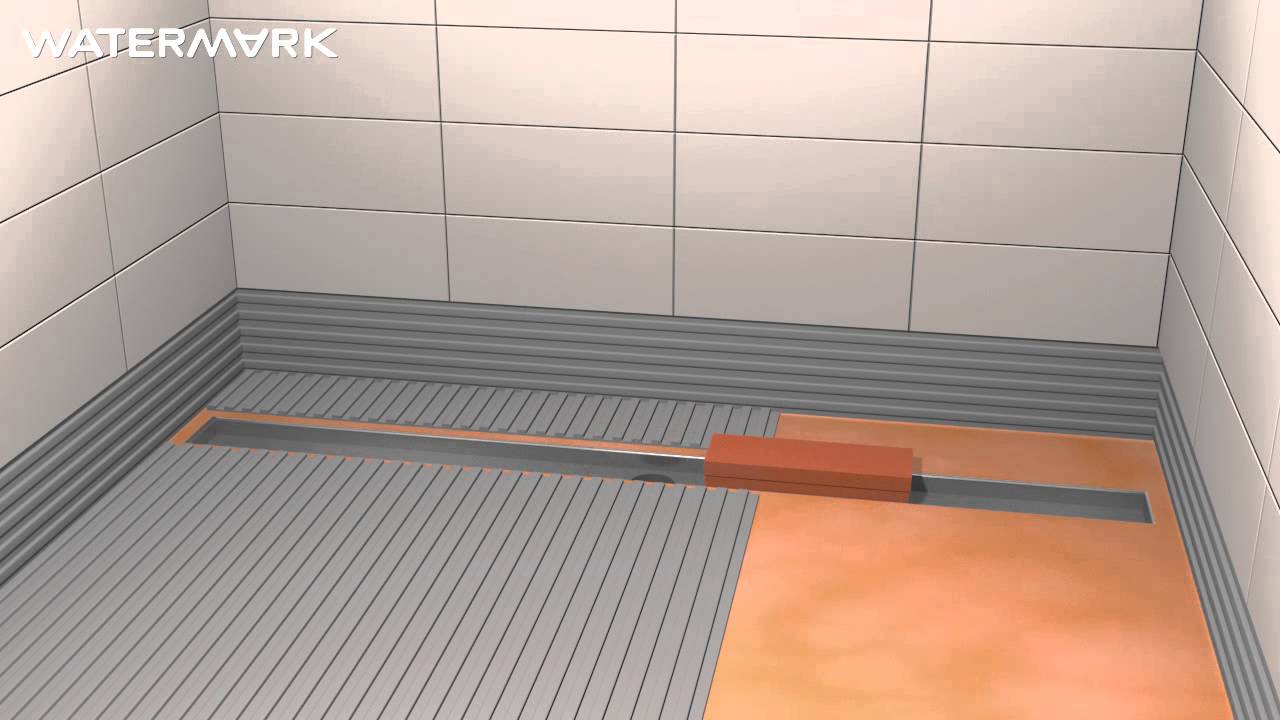
- Watermark – Linear drain installation with clamp drain.
- Clamp drain – Connection with discharge pipe must be watertight!
- Sloped mortar bed: descending towards the drain channel (min2%)
- MS Polymer – Sealant for pan liner bonding
- Seal the entire floor with pan liner, remove any air pockets
- Clamping ring with rubber gasket
- Concrete board – at least 1/4″ above floor level
- Remove the o-ring when using a rubber gasket sealing
- Watermark linear shower drain with height adjustable support
- Level the drain in all directions and test watertightness
- Sloped mortar bed: descending towards the drain channel (min2%)
- Flexible sealing compound
- 100% watertight due to pre-assembled waterproofing
- Flexible sealing compound
- Optional: seal the entire floor with thin-set membrane
- Flexible tile adhesive
- Elastic sealant joint around the channel
- Tile the floor
- Clean up excess sealant along the edge of the channel
- Adjust grate height by extending the grate support screws
To watch the step by step instructions, please go to this video: https://www.youtube.com/watch?v=o36sZD8Z9pw.