For a homeowner, there is nothing more satisfying then to walk in to a room, and see a beautiful finished home improvement project. A project, that you, the homeowner, completed yourself.
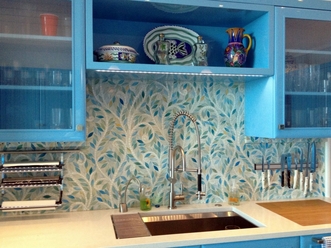
Fed up with looking at that same old tired paint on the wall? Want something beautiful; elegant that’s also easy to clean? Install a tile backsplash, a backsplash that makes your kitchen or bathroom look fresh and new.

Follow these simple steps to achieve the desired effects, without paying a professional to do it.
If your countertop is tiled, plan the layout so the backsplash grout veins line up with the countertop grout veins. If you don’t have a tiled countertop, start the first tile in the center of the base of the backsplash.
Step 1
Turn off the power to electrical outlets in the area where you’re working. Remove electrical outlet covers.
Step 2
Clean the area with warm water and allow to dry.
Step 3
Apply the manufacturer’s recommended adhesive with a notched trowel. Hold the trowel at a 45-degree angle and spread a very thin layer. Work in small 3-foot-by-3-foot areas to prevent the adhesive from drying out.
Step 4
Lay the first tile in the center at the base of the backsplash. Position the tile using a slight twisting motion. Use a level to make sure the tile is square. Place a spacer on each corner of the first tile. Cut one end of the spacers off in order to fit them between the countertop and the bottom of the tile. Push the spacers into the adhesive.
Step 5
Working out from the first tile, continue laying the tiles in a row, flush to the spacers. Wipe off any excess adhesive that oozes up between the tiles. Leave enough space to fill in with grout. Occasionally check to make sure the tiles are level. After one row is complete, begin with the next row and follow the same pattern. Apply adhesive as needed.
Step 6
If you need to cut tiles, score the tiles with a tile cutter. Don’t score the area of the tiles that will show. Use tile nippers or a saw to cut away the area carefully.
Step 7
When you place the tiles around an outlet, be sure the outlet cover hides the tile edges. Continue tiling as usual.
Step 8
When you’ve laid all the tiles, wipe off any excess adhesive with a damp cloth. Use a rounded stick to clean between the tiles.
Step 9
Allow the adhesive to set according to the manufacturer’s instructions. After the adhesive sets, remove the spacers.
Step 10
Mix the grout according to the manufacturer’s instructions. Since grout may irritate eyes and skin, wear safety goggles and latex gloves. Apply the grout using a rubber float. Spread the grout diagonally at a 45-degree angle across the tiles, packing the grout between the tiles. Wipe off the excess grout with a damp sponge when the grout becomes firm.
Step 11
Shape the grout joints using a rounded stick. Clean the tiles again and smooth the joints with a damp sponge.
Step 12
After the grout dries and a haze forms, wipe off the tiles and shine them with a clean cloth.
Step 13
Replace the electrical outlets and switches. You’ll need longer screws to replace the outlet covers. Use 1-1/4-inch to 1-5/8-inch screws with plastic washers behind the outlet to bring the outlet flush with the tile.
***If you have to cut tile, mark the proposed cut on the glazed side of the tile corners. Don’t mark on the clay side. The ink can be absorbed and bleed through to the other side.
Follow these tips for installing tile countertops or backsplash and your kitchen or bathroom will have a whole new look and appeal!

